Have you ever installed a theme from WordPress but the expectation never quite met the reality? The screenshot of the theme looked beautiful but you could never get it to look that way?
This is because setting up a theme on WordPress is completely different based on who created the theme. Getting the homepage to look right takes tons of time to configure. And then, once you do get everything set up, the page can take forever to load.
But now there is a better solution… Elementor!
You still need a theme, but Elementor allows you to customize ANY page with a simple drag and drop editor. The best part? Elementor is free!
Step 0: Setup Hosting & Install WordPress
I’m not going to go into too much detail in this post, but to customize your homepage with Elementor you’ll first need a domain, website hosting, and WordPress.
Luckily, you can get all three of these things with Bluehost.
I recommend Bluehost shared hosting to new bloggers and website creators due to its affordable price, free domain name, and one-click WordPress install. I’ve helped several friends and clients get set up on Bluehost with WordPress and it’s been a super easy process.
Click here for a step-by-step guide for setting up WordPress with Bluehost.
Disclosure: I am an affiliate for Bluehost. This means if you choose to purchase Bluehost I receive a commission – however, this adds no additional cost to you.
Step 1: Install a Lightweight WordPress Theme
If you’re using Elementor, your theme becomes much less important regarding the design of your blog.
This is because Elementor is a drag-and-drop page builder plugin that allows you to create complex designs visually. So, instead of relying on a theme for design, you’ll be relying on Elementor. And, with Elementor you can create just about any page design you can imagine.
For that reason, I recommend choosing a theme that is lightweight, responsive and reliable.
The following free themes are designed to work great with Elementor:
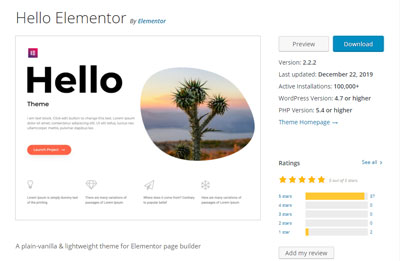
- Hello Elementor – I recommend this theme if you plan to purchase the Pro version of Elementor. It was created by Elementor to load fast, and so you can easily customize the header and footer.
If I had $50 to spend on a theme, I’d use it to purchase Elementor Pro and then use this included free theme to customize my header/footer.

- Astra – I’ve used this theme on several websites, including my own personal website. After testing on PageSpeed Insights, this theme performed the fastest second only to Hello Elementor.
It has many great customization features for your header (main navigation menu) and loads fast! The biggest downside is, there are lots of asks to upgrade to Astra Pro. This is not something I recommend as it’s more expensive than Elementor Pro. If you want to invest in a premium theme/builder combo I recommend the free Hello Elementor theme/Elementor Pro option.
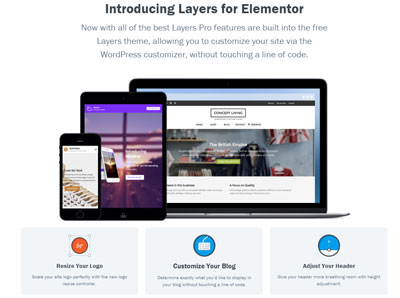
- Layers for Elementor – formerly a pro theme, Elementor recently acquired this product and now many of the features you used to have to pay for are free!
This theme is a great option if you want lots of customization features for your navigation and footer. Especially if you’d like a sidebar navigation menu. You will need to manually download and upload the Layers WP theme yourself however, it is not listed in the WordPress Dashboard theme search.
It also performed slightly slower compared to the other themes on this list.
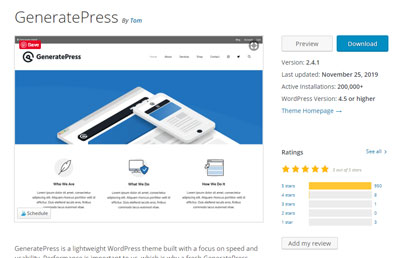
- Generate Press – offers several menu layout options and emphasizes a small footprint and clean code. This is a great minimalist theme that also has many customization options. It’s also less intrusive on the backed than Astra Pro.
Step 2: Customize Appearance for Chosen Theme
Before you can get started with designing your homepage, you need to set up the basic visual branding of your website.
For the purposes of this blog post, I’m going to show how to customize your blog using the Astra theme. Note that this setup differs slightly for every single theme.
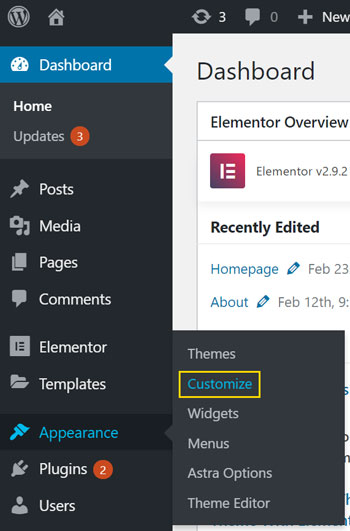
But, for the most part, every main customization happens using Appearance > Customize in the dashboard section of WordPress.
Using the Customize page, you’ll quickly set up your website’s:
- Site Identity (Name, Logo, Site Icon)
- Fonts
- Colors
- Main Navigation Links & Layout
- Footer Layout
Editing Your Site Identity
Let’s start by editing your Site Identity. You can access this by clicking the top left text, or, but choosing Header > Site Identity from the main menu.
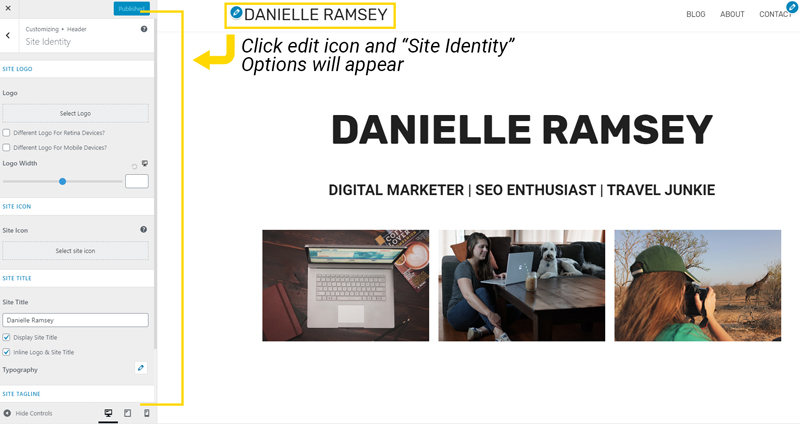
To set up your site identity you’ll need the following:
- Logo. WordPress suggests image dimensions of 180 by 60 pixels. If you don’t have a logo you can skip this step, or you can create a logo in Photoshop or Canva.
- Site Icon. Your site icon is the little square logo that appears in browsers next to your page title. WordPress recommends a size of 512 by 512 pixels, but make sure this is very simple and looks good small. It’s usually only displayed as a 32 by 32 px image.
- Site Title & Tagline. You can choose whether or not to display these on your website.
Once you get these elements created, importing the images for your logo and site icon, and editing your site title and tagline is pretty self-explanatory. Just follow the prompts and upload or choose your images.
P.S. If you’re interested in a blog post on how to create your own logo in Canva or Photoshop, let me know in the comments!
Selecting Custom Fonts
Astra allows you to select from all of Google’s free open-source fonts. But, there are lots to choose from. If you’re looking for some inspiration, check out my post on how to choose the best Google fonts for your blog.
My biggest piece of advice on font choice is, readability is way more important than aesthetics.
You can get away with a more decorative font for your headings, but especially your base typography should be a simple, easy-to-read font.
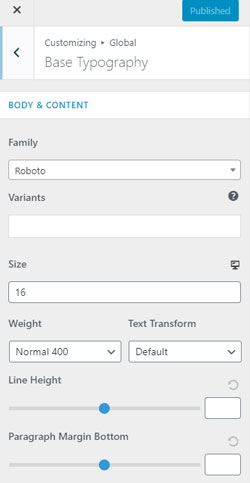
To edit your fonts, on the Customize page you need to go to two different sections:
1. Global > Typography > Base Typography
This is your main body text that will show up as your blog page and paragraph text.
2. Global > Typography > Headings
This is the text that appears at the top of your pages and posts, and what you use to divide up big blocks of content. Typically it’s larger so it can be a little more decorative.

I suggest keeping the same Headings for all of your h1-h6 tags and then using Inherit as the setting for each individual heading.
Editing Colors
The Astra free theme doesn’t have a ton of color options, but you will be able to make basic color edits for text, buttons, and background colors.
To access the color options from the Customize page choose Global > Base Colors.
Check out the diagram below to see what the different colors represent. Note that this is just an example.
I used bold colors in this example to make it clear which colors were associated with which website elements.
I actually recommend using only two-main colors in your blog, especially if you’re a beginning designer. Check out my post on how to choose colors for your blog brand for more tips.
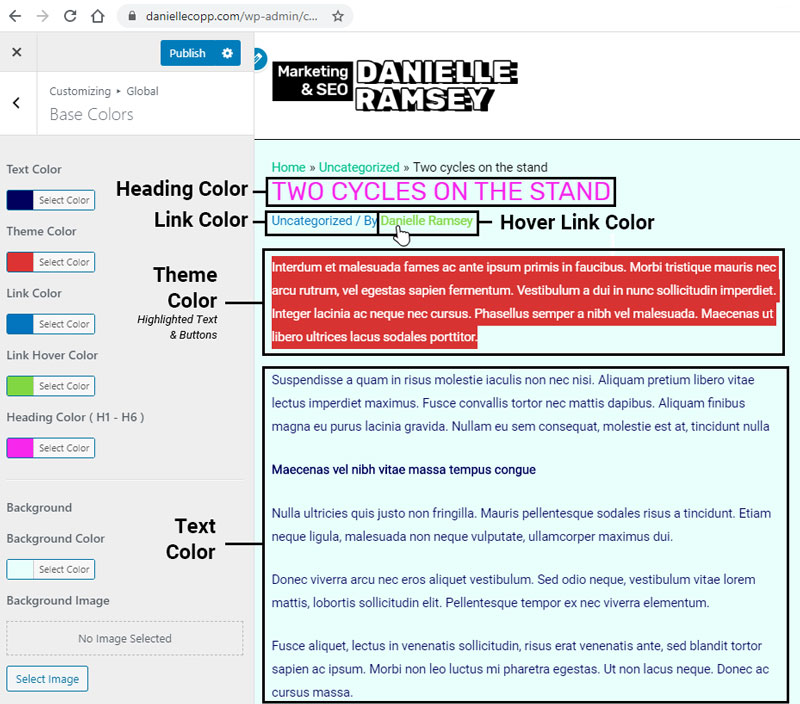
Now, for the free Astra theme, here is a breakdown of the options you have for altering colors:
- Text Color – the majority of the text on your website. This is the main body text and descriptions used on your pages and posts.
- Theme Color – Think of this as your blog’s accent color. Used in Astra for elements like button, selected text background color, etc.
- Link Color – Link color when not hovered over.
- Link Hover Color – Link color when the mouse hovers over the link.
- Background (Color and Image) – background color for the body of your entire site. You can also select a background image (although I don’t recommend it).
Main Navigation Menu & Layout
As you add pages to your website, you’ll need to decide how they’ll be displayed in your Main-Menu.
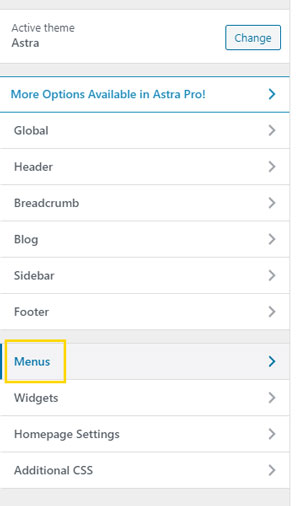
From here, you’ll be able to add any pages, posts, or even entire categories to your menu. There are lots of options.
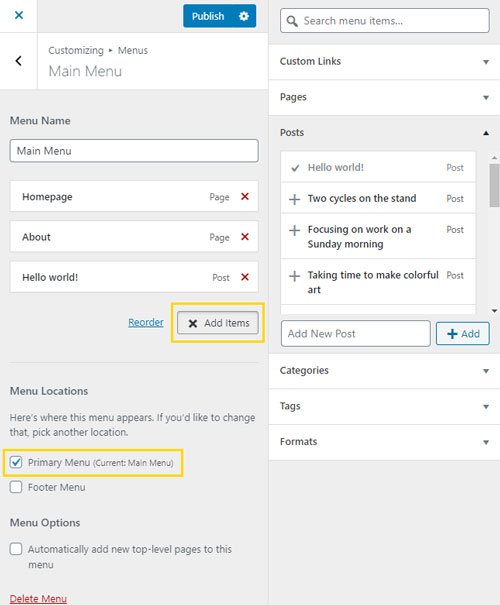
Make sure ‘Primary Menu’ is checked and your pages will be updated in the main menu navigation.

Once you have some pages added to your Main Menu, you may want to change the layout.
To do this, access Header > Primary Header
From here, click the options to decide which you like best. I do recommend your logo on the left and menu items on the right.
This has become the standard way of laying out websites so it’s best from a user experience standpoint.
The last thing you might want to do with your header is add search functionality or a call-to-action button.
To do this, you need to go to Header > Primary Menu
From the dropdown menu, select from the options.
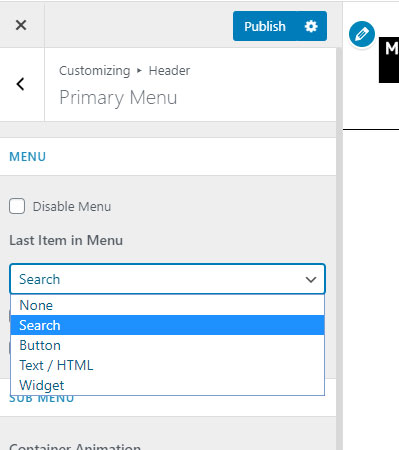
Choosing the search option will make it easier for people to search your website:

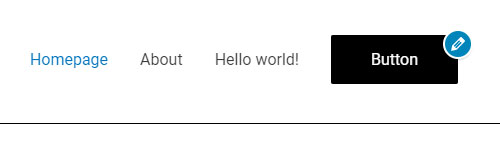
And choosing the button option will make it easier for you to highlight a call-to-action page on your website.
This is great if you’re trying to drive traffic to a specific page:
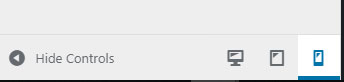
Finally, as you scroll down there is an option for your Mobile Menu. Make sure to select a Toggle Button color that shows up.
By default, mine was white and my header menu was white. This meant on mobile no one could see my menu.

Pro tip: Make sure you’re always testing how your site looks in mobile to prevent major mobile design errors. Up to 50% of your traffic could be mobile – don’t make it harder for them to use your website!
You can leave the Menu Label blank, or opt to name it if you’d like.

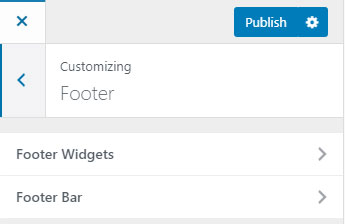
Editing Your Footer
The last main thing to customize is your footer. Many people use the footer to include links to their privacy policy, terms and conditions. Another option is to link to social media links.
There are two options to configure. One us Footer Widgets, and the other is the Footer Bar
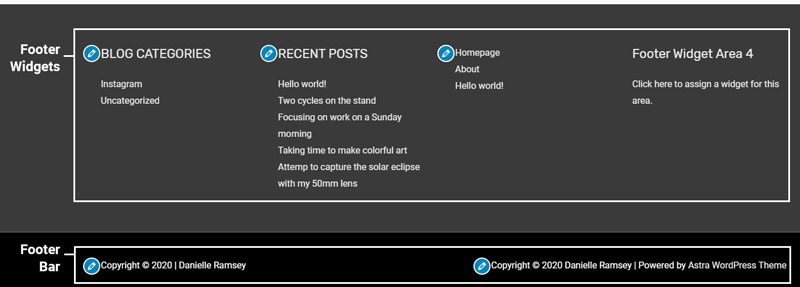
With Footer Widgets, you really only have two layout options with the free version of Astra. You can either choose to have a four widget layout, or no widgets at all.
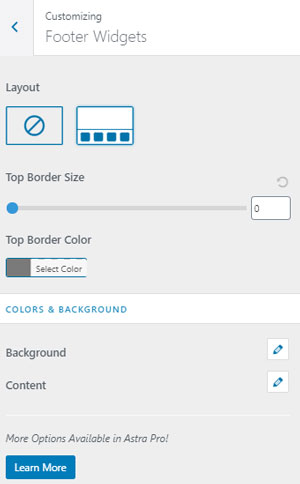
You can also edit the background and text color of your footer widgets area.
To fill in the footer widget areas, you ‘ll need to access your main WordPress dashboard and select Appearance > Widgets.
From here you can add a number of widgets to your Footer Widget Areas. Note that the footer bar also allows for widgets – but you can also add text or menus.
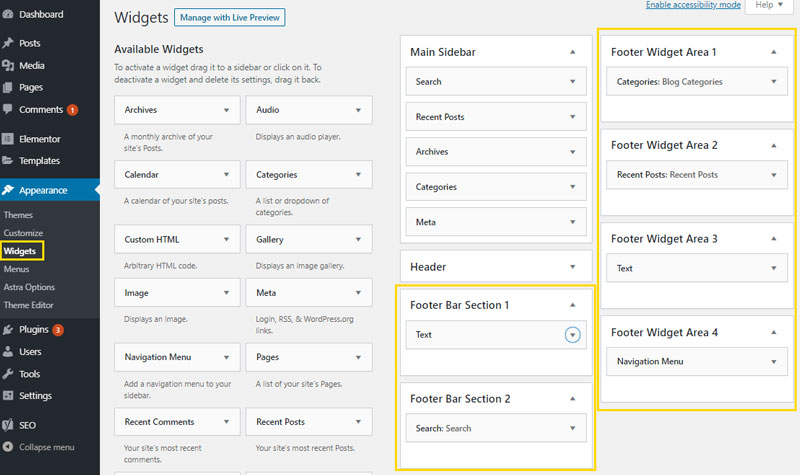
Setup for the footer bar is similar, except you can choose from Text, Widget or Footer Menu Options.
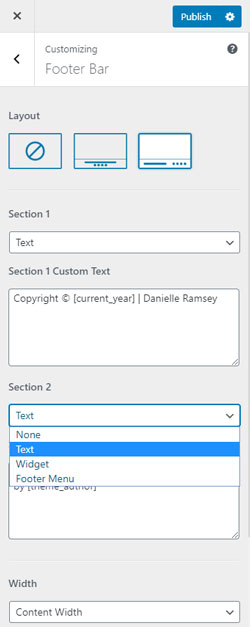
Note that a widget will only show up in the footer bar section if you choose the ‘Widget’ option. Otherwise, the other option overrides this choice.
Now, Your Basic Site Branding is Complete
Once you’ve completed these steps, your basic site branding is complete. There are a few additional customization options with the free Astra theme, but the above is all you need to get your website’s homepage customized.
As you work on other pages, I recommend customizing the Sidebar and Global > Container settings. This will adjust the default layout of your other pages and posts.
Step 3: Install Elementor
Ok, Step 2 was long, but very important. Customizing your site’s header, footer, colors and typography sets the tone for the entire website.
Luckily, Step 3 is super simple. All you need to do is install the Elementor Plugin.
To do this, go back to your WordPress Dashboard and Select Plugins > Add New.
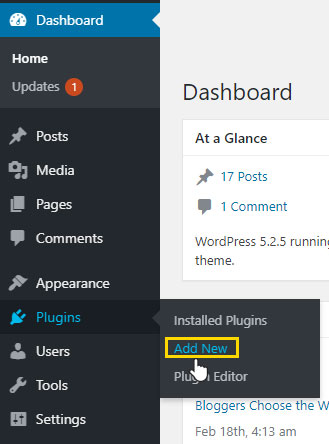
Now, you’ll just need to search for “elementor.”
You’ll want to install the Elementor Page Builder by Elementor.com
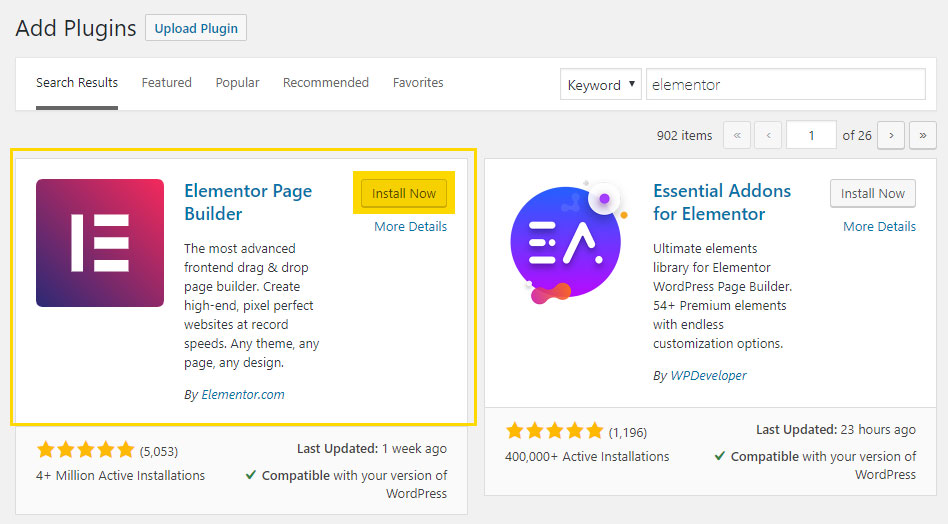
Click Install Now, and then once the plugin installs, click Activate.
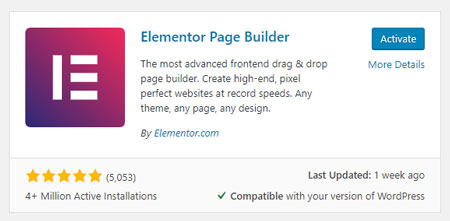
Ok, that’s it! Now Elementor is installed on your WordPress Blog. Let’s get building your homepage!
Step 4: Create a Page
First, we need to set up your page for Elementor. I recommend starting fresh with a brand new page.
To this, go to Pages > Add New
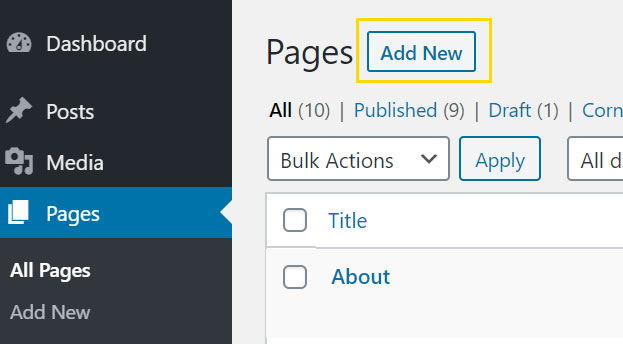
Now, go ahead and name your page ‘Homepage’ or something similar that you’ll recognize as the front page of your website. This won’t show up in the design of your website, but you’ll want to label it something memorable.
Finally, you’ll need to expand your page attributes and Astra Settings in the sidebar. It’s essential to change these settings, so you’re able to fully control the page with Elementor.
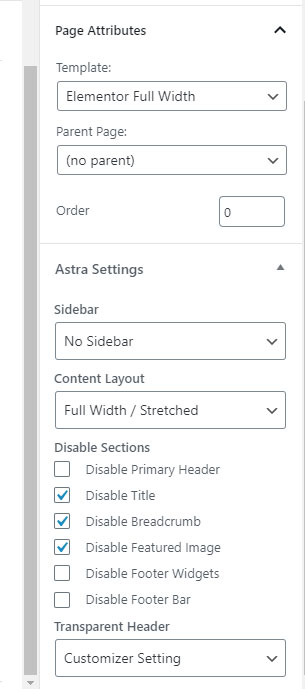
- Under ‘Page Attributes’ make sure to change the Template to ‘Elementor Full Width’
- Under ‘Astra Settings’ make the following changes
- Sidebar > No Sidebar
- Content Layout > Stretched
- Disable your Title, Breadcrumb, and Feature Image.
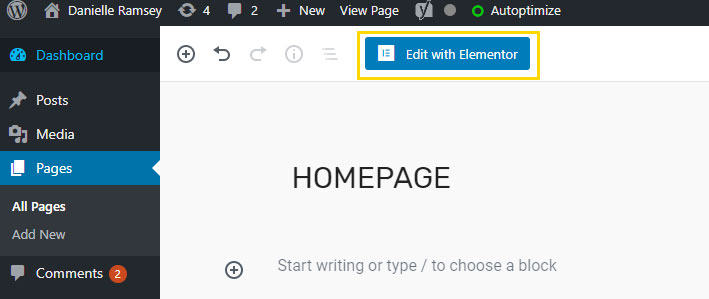
Now you have a blank slate to create your custom home page. It’s time to edit with Elementor.
To do this, click Edit with Elementor at the top of the page.
Step 5: Design Page
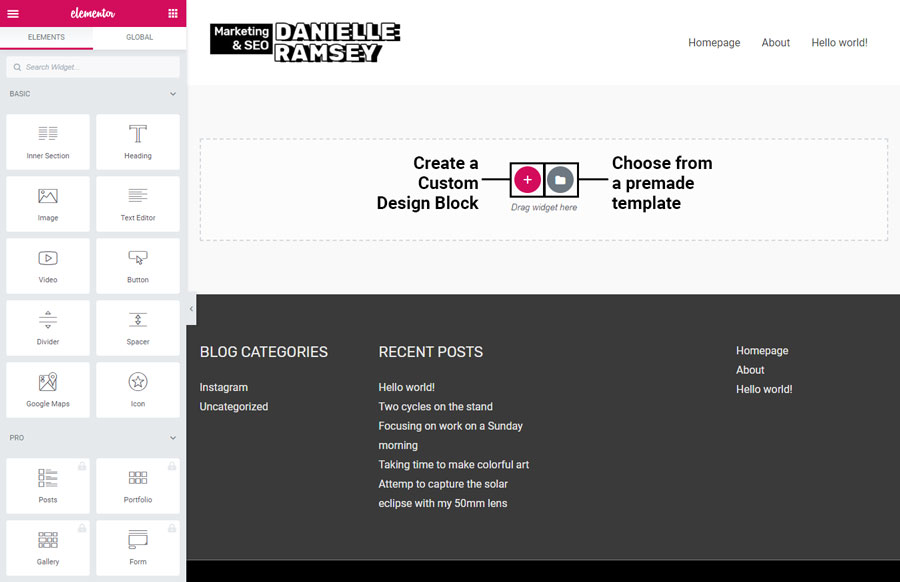
Now, you’ll be able to edit your page with Elementor.
There are two basic options to choose from:
- Create a Custom Section
- Import a Page Template or Section Template
I personally only create custom designs. I’ve found out the hard way that premade templates tend to add lots of bloat and unnecessary animations that slow down your website and are bad for the user experience.
I also end up spending so much time rebranding them, that it’s not really worth it.
For this reason, in this tutorial, I’ll only be covering how to create a custom design, but feel free to experiment with templates!
As you create a custom design, the first thing you’ll probably want on your homepage is a banner that describes what your site is about, along with a call-to-action button (CTA) driving traffic to a specific page.
To create your custom banner, click the “+” button. This will load a new screen asking you to pick your structure.
This means, how many columns do you want this block of content to be?
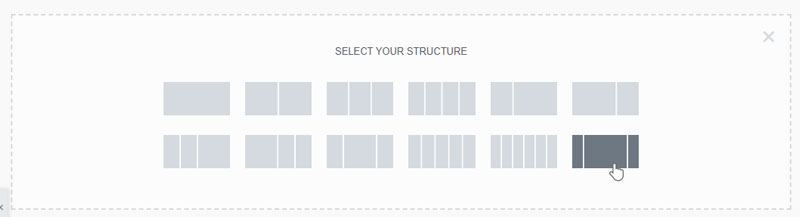
In this example, we’re going to go with a three column layout, using the two side columns only for spacing.
Once you choose your column-layout, you’ll see an outline of the columns on the screen.
Now, here’s where things get fancy. While you can add individual elements to each column, you can apply background effects to the entire section row.
This is how you can add a background image to your banner. To do this, first, click the dots in the tab, then in the left sidebar click the “Style” button.
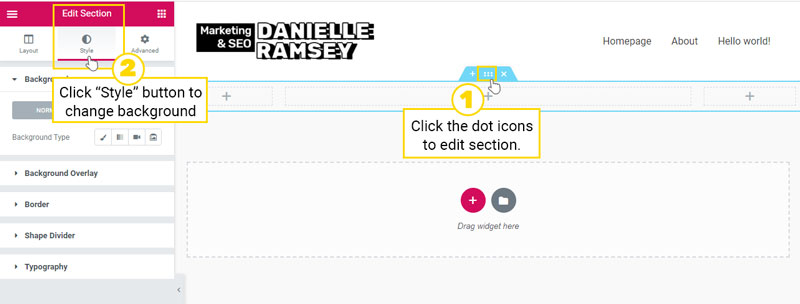
- Under the “Style” tab, find Background. Click the paintbrush icon. From here you can either add an image or choose a color.
- Optional: Click back into the Layout tab. I usually like to set a minimum height of 400px, so that no matter what, my background-image is visible.
- Optional: Go back to the “Style” tab. Here you can add an overlay color to your background image. There are different overlay options to choose from as well.
Once you’re satisfied with your background image, it’s time to add some text!
You should have an H1 tag on every single page, and it should be the first heading on your page. Usually, your theme auto-creates an H1 tag for you, but we disabled that functionality so we could customize our homepage.
So, now we need to add an H1 tag back in. To do this, click outside of your section to get your widget elements to appear. Select the “Heading” element and drag it into one of your banner columns.
Edit the content and make sure to change the HTML tag to “H1.” You can choose to center, left-align, or right-align your text here as well.
Next, click the “Style” tab. Adjust the color and style of your text to your liking.
Once you’re done with that, it’s time to add a button! This process is nearly identical to how you added your Heading element.
Simply click off to get your widgets to appear and drag-and-drop your button. You can edit the text content and add an icon in the “Content” tab and then further adjust the look of the button in the “Style” tab.
That’s the basics of how to use Elementor to design your page.
Here’s a quick refresher:
- Create a Section and Select Your Layout
- Stylize the Section Background (if you want)
- Add Elements to your Section’s Columns. Use the style table to adjust the look and feel of these elements.
Step 6: Set Page as Homepage
Once you’ve finished designing your new homepage, hit publish.
Now, there is one last step. Go back to your WordPress Dashboard and select Appearance > Customize again.
Click “Homepage Settings.”
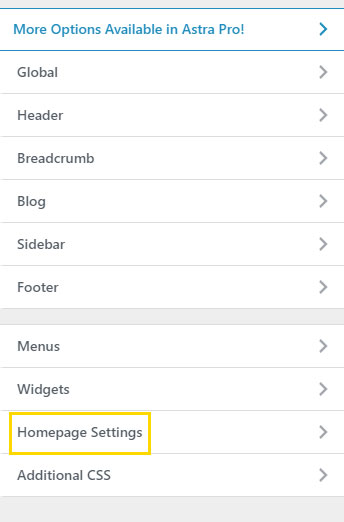
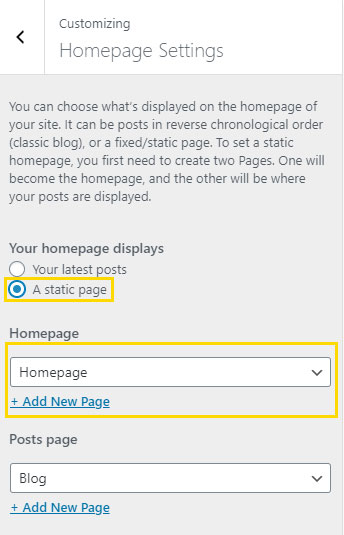
This is where you set your newly created page as your homepage.
To do this, make sure you have your homepage displays set to “A static page” and choose the name of your newly created page under the dropdown for “Homepage”.
That’s it! Now you’re done and you have created a customized homepage using Elementor.
Note that while you can do a ton with the free version of Elementor, it is does have some limitations that might make upgrading to Elementor Pro worth it.
Limitations of Free Elementor
If you’re a blogger, the number one reason to upgrade to Elementor Pro is, there is no way to add “Recent Posts” except for as a text list.
If you want complete control of how your blog posts display on your homepage with featured images, etc, then Elementor Pro is a great option.
Additionally, with Elementor Pro you can completely customize your header and footer with drag and drop functionality like you can pages. If you need more control over your header and footer, this is another great reason to upgrade.
Those are the two really great upgrade features, but Elementor Pro also comes with 50+ Advanced Widgets.
Here are just a few of these widgets:
- Posts
- Nav Menu
- Share Buttons
- Search Form
- Table of Contents
- Template
- Global
- Gallery
- Testimonial
Elementor Bonus Tips
- Try to keep your blog design nice and simple. You don’t need a fancy design. Less is more.
- Avoid Animation – it might look cool, but this is bad for usability.
- Don’t use pre-made Elementor templates. You’ll have to spend a ton of time changing the fonts and making sure the colors are the same. PLUS, they almost always slow down your website.
Also, note that Elementor works great with WordPress’s new Gutenberg editor.
Elementor recently released a new plugin Blocks for Gutenberg Plugin