Back in the early 2000s weblogs (now known as blogs) were basically glorified online diaries. Fast forward to 2019 and a lot has changed. There are now a ton of great reasons to start a blog.
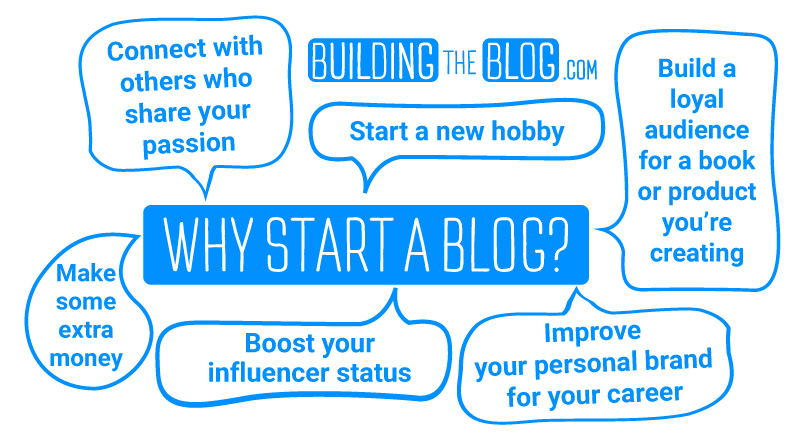
Starting a blog can help you:
- Improve your personal brand for your career
- Build a loyal audience for a book you’re writing or product you’re creating
- Make some extra money
- Boost your influencer status
- Start a new hobby
- Connect with others who share your passion
Whatever your reason, right about now you’re probably wondering – how do I get started with making a blog? And how do I start a blog the RIGHT way?
Don’t worry, I get it! Creating a blog or website from scratch is a daunting task. Especially if you have limited technical abilities.
That’s why I’ve put together this easy-to-follow guide for complete beginners to walk you through the ENTIRE process of starting your first blog. And, you don’t need any prior experience to do it!
You’ll learn everything it takes to get started. From choosing your topic and domain name to publishing your first post and driving actual traffic to your website.
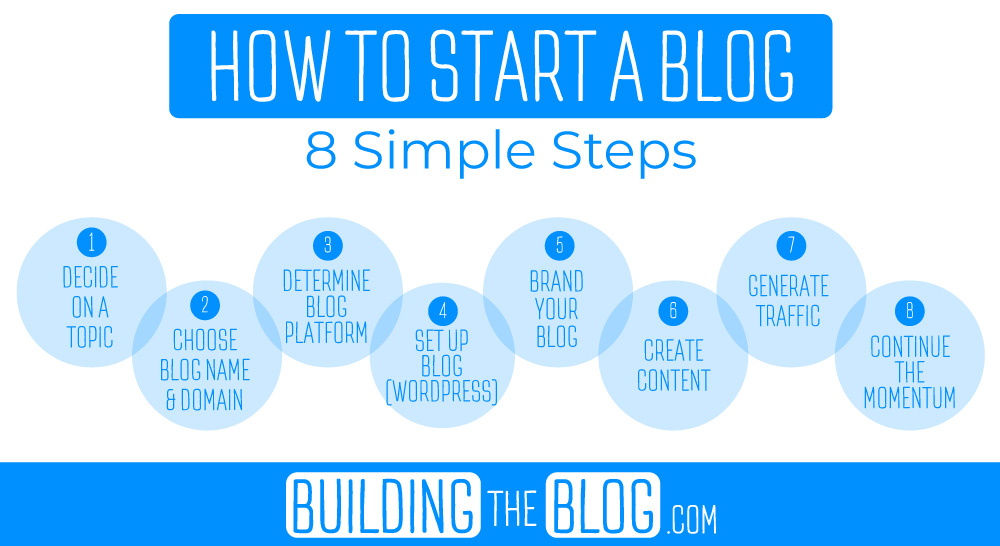
Here is the simple 8-step process for launching your blog:
- Decide on a Topic
- Choose a Blog Name & Domain
- Find a Blogging Platform
- Set up WordPress (or your chosen platform)
- Brand Your Blog
- Create Content
- Generate Traffic
- Continue the Momentum
Step 1: Decide on a Topic
If you’ve decided to start a blog, you probably already have a topic in mind.
But, if you’re still trying to decide on a topic, here are a few ideas.
I’ve included both broad topic ideas as well as more niche versions of the topic.
Blog Category Ideas
- Health & Fitness > Paleo Diet, Yoga, Female Bodybuilding, Essential Oils
- Gardening > Terrariums, Vegetable Gardening, Bonsai Trees
- DIY & Crafts > Origami, Scrapbooking, Knitting
- Education > Grade School Lesson Plans, Homeschooling
- Home Decor > Mid Century Modern, Industrial, Bachelor Pad
- Fashion & Beauty > Women’s Thrift Store Tips, DIY, 5-Minute Makeup Routines
- Travel > Budget Travel, Historical Travel, Unique Restaurants/Bars of the U.S.
- Food & Drink > Fancy Cocktails & Shots, The Science of Food
- Art & Design > Doodling, Photoshop Scrapbooking, Animation
- Video Creation > Animation, Budget Lighting Setups, Phone Videography
- Photography > Film Photography
- Writing > Bullet Journals
- Pop Culture > Indie Movie Reviews, Puzzle Video Games (Twitch)
- Books > Self-Help Book Reviews
- Pets > Cat Training, Best Organic Pet Treats
A few pieces of advice for picking a topic.
Find a Way to Stand Out in Crowded Niches
In general, for brand new blogs it’s going to be easier to find your audience if you pick a more specific topic.
For example, there are tons of blogs out there on travel. Especially solo female/male or couple travel. At this point, it’s a more difficult topic to break into.
So, to stand out in, try putting a unique spin on these common topics. I.e. focus your blog on the most haunted places to visit in the world. Or unique music venues you’ve come across in your travels.
When you’re starting out, putting a unique spin on a topic in a crowded niche will help you stand out from the crowd.
For your audience, this means they’ll connect with you more easily. And for Google, this generally means you’ll be able to ‘rank’ higher, faster, for specific searches related to your topic.That being said, if you have a blog with more diverse topics, for example, a lifestyle blog, you can still be successful but you might have a harder time with organic search traffic. We’ll come back to the topic of building traffic later on in this tutorial…
Pick a Topic with a Large Enough Audience to Fulfill Your Blog Goals
If you’re just blogging for fun, this isn’t as big of a deal. But, this guide is assuming that you’re trying to generate traffic to your website to either make money or build a list of followers.
A quick and easy way to get an estimate of how many people online are interested in your topic is to check social media sites like YouTube, Pinterest, or Instagram.
Search for your topic and look to see how many views/repins/followers a topic is getting.
The point of this is to just make sure you’re not blogging about something too obscure.
Step 2: Choosing a Blog Name & Domain Name
The last thing you need to do before your set up your blog is choosing a name and domain name.
Before we get started, let’s level set.
What is a blog name and domain name?
Your blog name is simply how you want people to refer to your blog. Think of it as a social media handle for your website.
Your domain name is the actual web address people use to go to your website.
I highly recommend that you choose a blog name and domain name that match.
For example, my blog name is Building the Blog and my domain name is buildingtheblog.com.
Making my domain name btblog.com or buildingtb.com would make it harder for my audience to remember my web address.

This will make it much easier for visitors to recall your blog and it will be better for search engines.
This step can be stressful, but don’t sweat it.
Yes, choosing a domain name and blog name is a big decision, but don’t let it stifle you.
Many new bloggers get stuck on this step and lose valuable time getting started. This step is important, but if you follow a few simple rules you should have a great name.
Blog Domain Dos & Don’t
Do this when choosing a domain name:
- Pick something easy to remember and say. I personally lean toward real words and phrases.
- Avoid unusual spellings.
- Avoid numbers.
- Use words that match your niche (i.e. if your blog is about paleo dieting, try to include paleo in the domain)
- Choose a .com if at all possible. But, .net or .co are the best alternatives if you have your heart set on a specific domain name.
- Keep Your Domain Name Short (Fewer than 15 characters)
Don’t do this when choosing a domain name:
- Avoid using acronyms or hard-to-remember letter jumbles
- Don’t use hyphens if at all possible. Why? Hyphens are correlated with spam and reduce memorability.
- Avoid uncommon TLDs like .info, .biz, .site. They’re more likely to be associated with spam and are less memorable.
Step 3: Finding a Blogging Platform
There are so many blogging platforms to choose from, but in general, they fall into three categories.
- Free Third-Party Platforms
- WYSIWIG (What You See is What You Get) Platforms
- Open Source Platforms
Each of the three categories has its pros and cons.
But, for those who are serious about blogging for money or boosting their profile, I highly recommend going with Open Source Platforms (and more specifically WordPress).
WordPress is my recommended platform for those serious about creating a professional blog.
That being said, this is a comprehensive blogging guide, so read on for a brief overview of all three platform types.
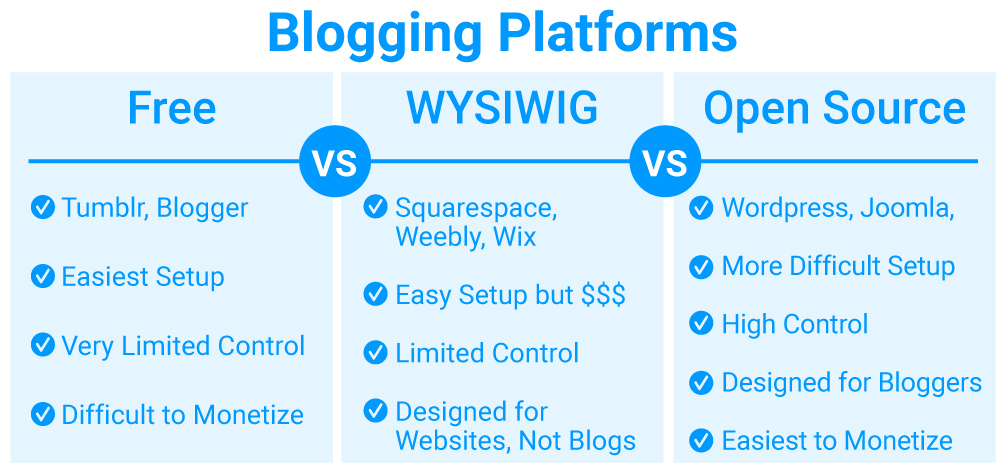
Free Third-Party Platforms
These platforms are designed for hobbyists just looking to have fun with their blogs. Think Tumblr and Blogger. Generally, these are dominated by the youth crowd.
If you’re planning on just using your blog to make some friends online or share your thoughts, these blogs could be good options for you. They’re easy to set up and free.
But, if you want to customize your blog, look professional, build a subscriber list, or monetize your blog in the future, these blogs aren’t a good option.
WYSIWIG (What You See is What You Get) Platforms
These are the platforms you see advertisements on TV for or hear about on your favorite Podcast. Think platforms like Squarespace, Weebly, and Wix.
Typically, these platforms target small businesses like photographers, musicians, restaurants, and other small “mom & pop” shops.
WYSIWIG is a great option if you’re hosting a static website with only a few pages. But, a blog is not a static website. A blog is something that should be constantly updated to be successful.
Squarespace, Weebly, and Wix are also generally more expensive than hosting WordPress and allow fewer customizations.
Open Source Platforms
These platforms are 100% what I recommend for bloggers that want to be taken seriously. Open Source Platforms like WordPress and Joomla are technically free. But, you do have to pay for a service called ‘hosting.’
Free platforms don’t charge for this because they’re making money by displaying ads to you, and on your website. With WYSIWIG platforms, the cost of hosting is generally built into the price of the monthly service which is more expensive than basic web hosting.
The great thing about Open-Source platforms, more specifically WordPress, is that they’re highly customizable. You can easily set up your website for monetization or for building a list of subscribers.
Step 4: Setting Up WordPress on Bluehost
When it comes to actually creating a professional blog, this is the only step of setting up your new blog where you actually need to invest money. The good news is, hosting is relatively affordable, especially if you compare it to a lot of other hobbies and business investments.
There are free options for virtually everything else (i.e. email, landing pages, traffic building).
But, for a professional, domain-hosted blog, with reliable uptimes, you need to purchase hosting.
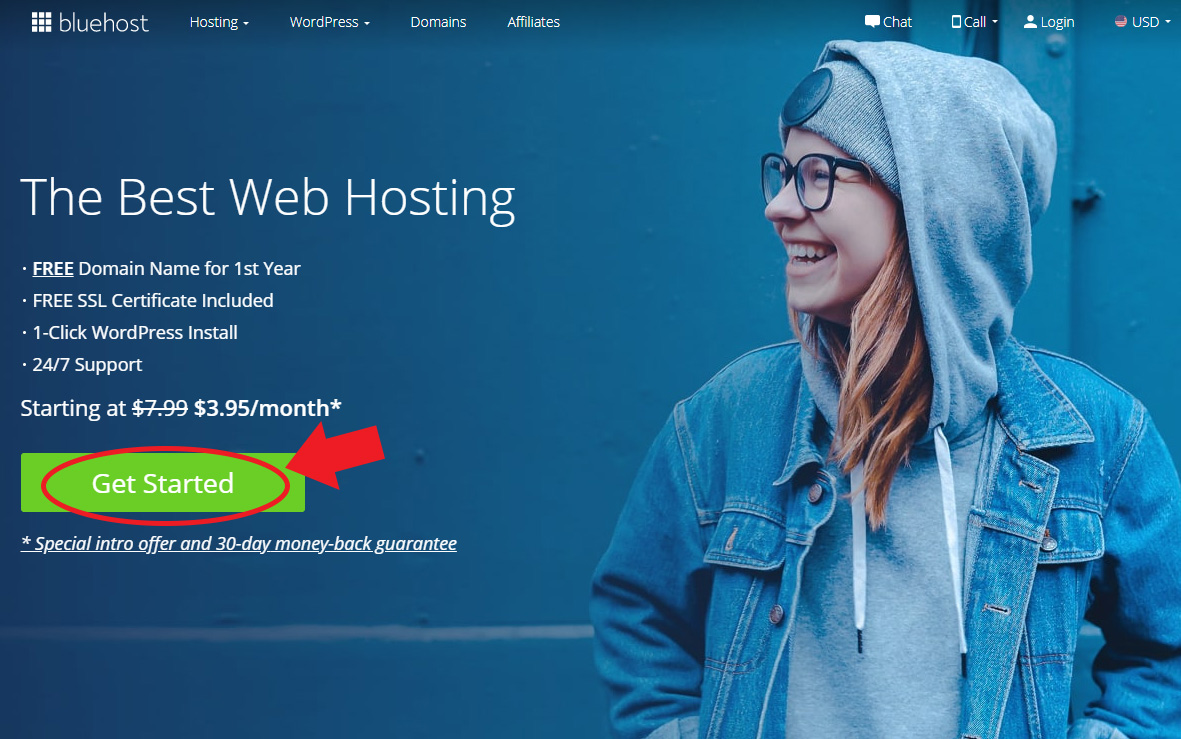
I highly recommend Bluehost if you’re just starting out and not tech-savvy.
Bluehost is an affordable option that’s great for new bloggers because of how easy they make it to install WordPress.
Zero technical skills are needed and you can get started in 10-minutes!
Here are a few more reasons I recommend Bluehost:
- Features a 1-Click WordPress Install (EASY!!)
- Bluehost includes a free domain name. This is something other providers often charge extra for.
- An SSL is included for free with your hosting. This is great for SEO and many other hosting providers charge you extra $$ for this.
- Bluehost has been recommended by WordPress.org since 2005.
If you do happen to be technical (as in, you know command-line Linux) and have a little more time & money to spare DigitalOcean is my preferred ‘premium’ alternative. It is not for beginners though.
But, If you’re reading this blog post, I’m going to assume you’re a beginner and not a coder.
Ok, now comes the part where it’s time to follow along and actually set up your blog!
Quick Follow-Along Guide to Installing WordPress on Bluehost
First, Click here to get Building the Blog’s Special Bluehost Pricing
After you click the above link, click ‘Get Started’ to continue.
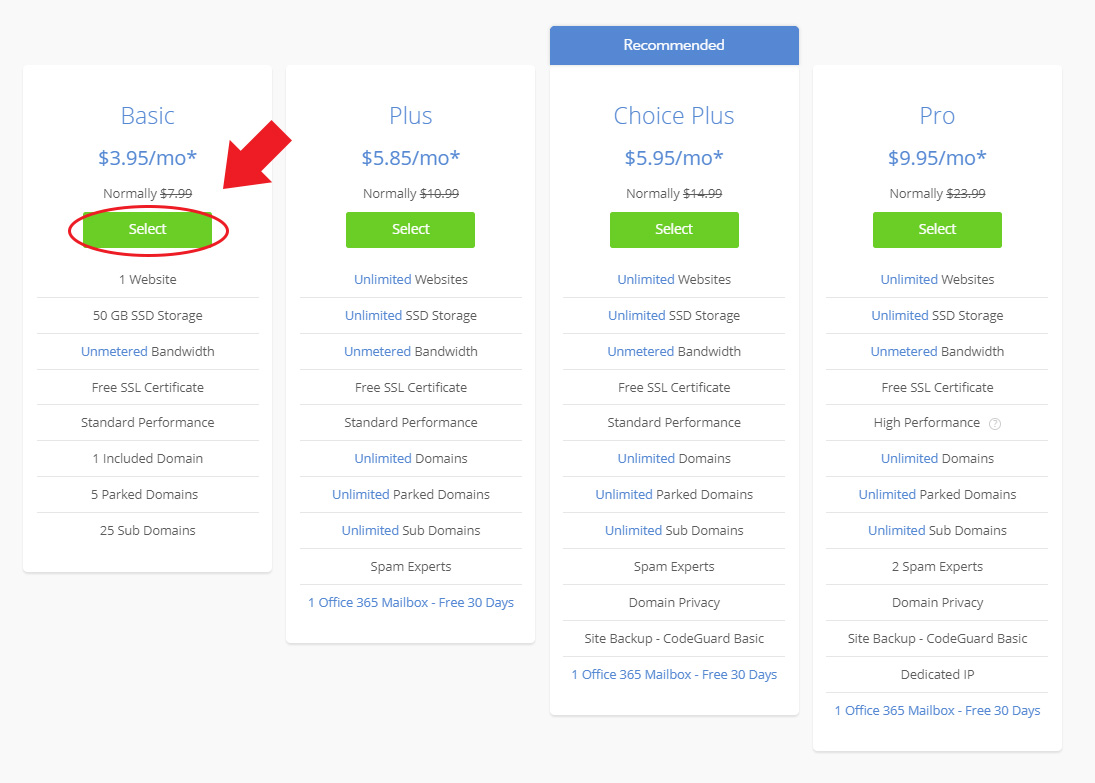
Select Your Hosting Plan
I recommend you just start out with the basic option. You can always upgrade later if you find you need a more premium service. For beginners, the basic service is more than enough.
Request Your Free Domain Name
If you have already decided on your domain name, now’s the time to enter it!
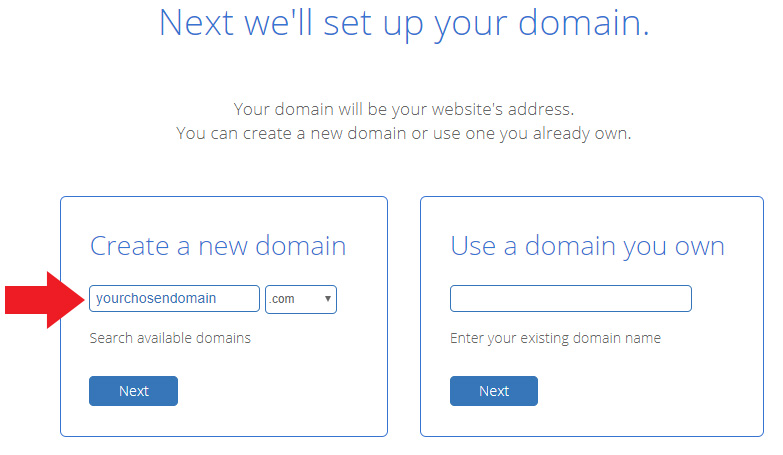
Bluehost offers a free 1-year domain with hosting packages. These usually cost $11.99/year, so this is a great deal!
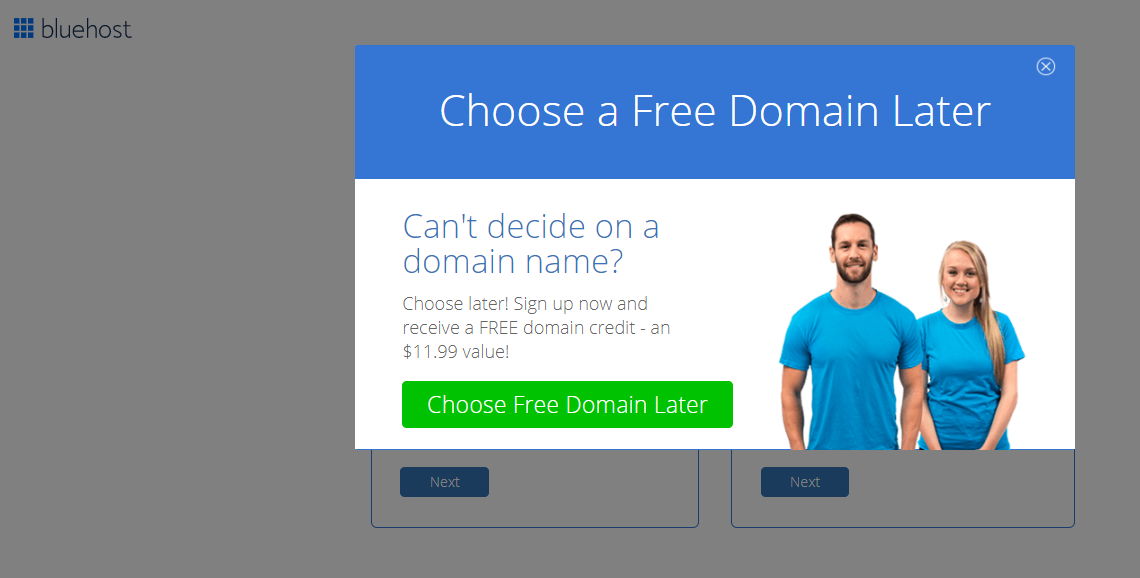
If you’re not sure what domain you want though, no worries. You can choose it later.
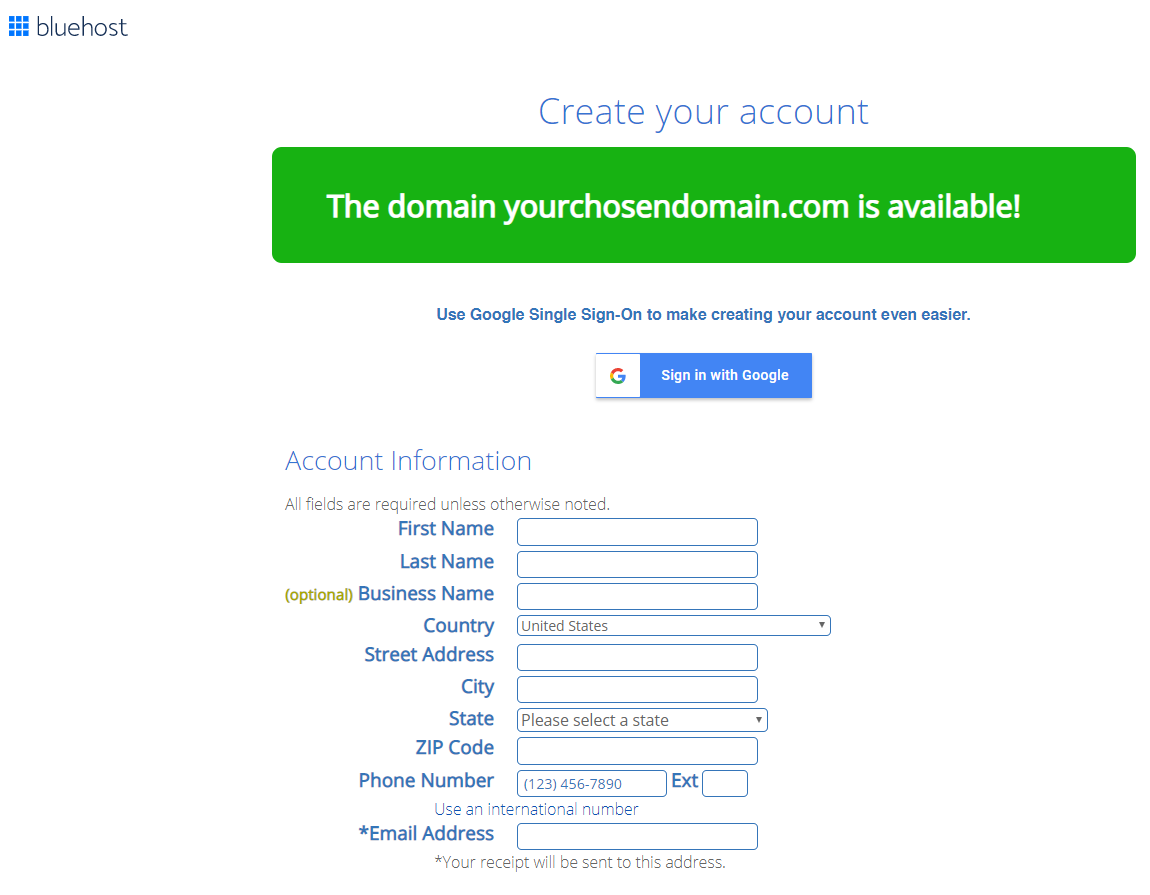
Create Your Bluehost Account
First, enter your account information.
Next, choose your specific pricing package. The longer you commit, the less you pay per month.
Keep in mind, all accounts plan options do require you to pay upfront (even though they’re billed monthly).
With my Special Code, Here are Your Three Payment Options:
- Three year commitment: $142.20 ($3.95/month)
- Two year commitment: $118.80 ($4.95/month)
- One year commitment: $71.40 ($5.95/month)
Obviously, the best deal is a three-year deal, but it does come with a higher upfront cost.
After your initial hosting package expires, the monthly price will increase to $7.99/month. If you commit to 1 year, this will happen at the beginning of year 1. If you commit to 3 years, this will happen at the beginning of year 4.
TL;DR; By choosing a longer-term, you’re able to extend the best pricing for longer but the upfront cost is higher.
Choose any Package Extras
The only package extra I recommend is Domain Privacy Protect.
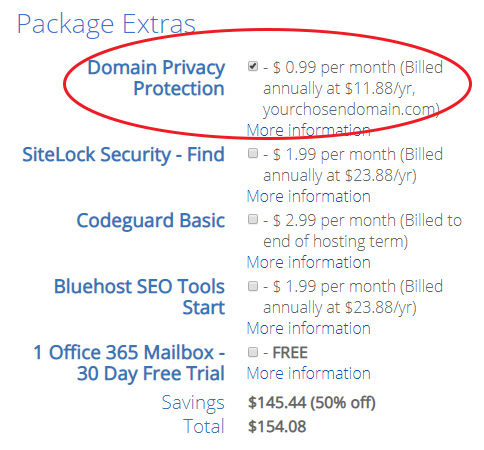
If you don’t purchase this, then anyone with your domain name can look up the address and phone number you used to purchase your domain on Bluehost.
I strongly recommend purchasing this feature. It will prevent spam and robocalls from calling the phone number associated with your account.
The last thing to do is finalize your hosting purchase by entering your payment information and agreeing to Bluehost’s Terms & Conditions.
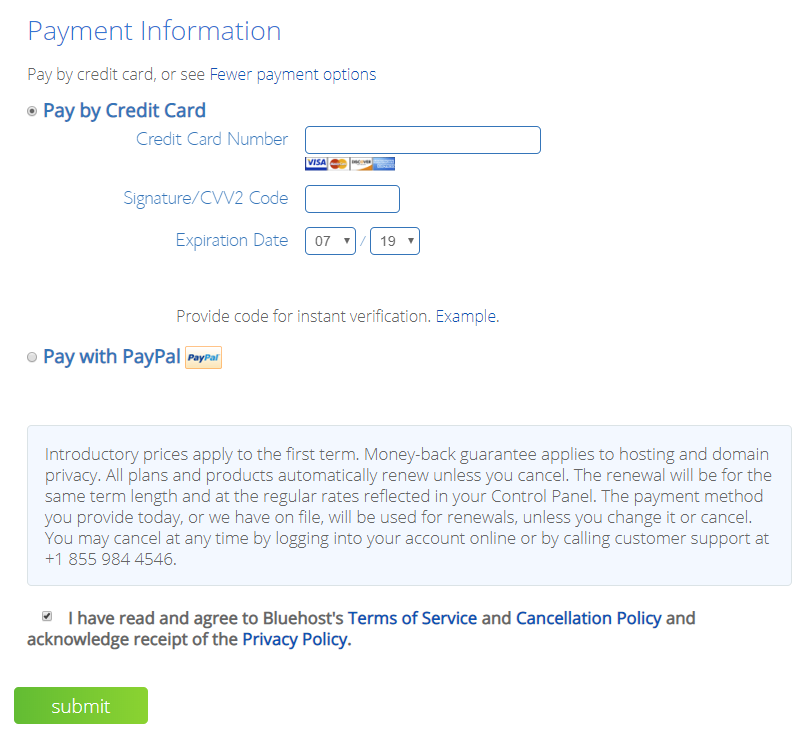
Congrats! Now all you have to do is complete the 1-click WordPress install and you’re ready to get blogging!
Choosing a Theme/Design for WordPress
WordPress themes are the first step to creating a custom design for your blog.
There are thousands and thousands of themes available, some are free and some are paid.
WordPress comes with a default theme that’s released every year. Most bloggers opt to install a different theme.
There are two ways to add a new theme to your WordPress blog.
- Searching & Adding Themes Within Your WordPress Admin Backend
- Direct Upload of a Theme .Zip File (You can download these from multiple sources)
Typically the main reason to directly upload a theme is if you have purchased a theme from a third-party website.
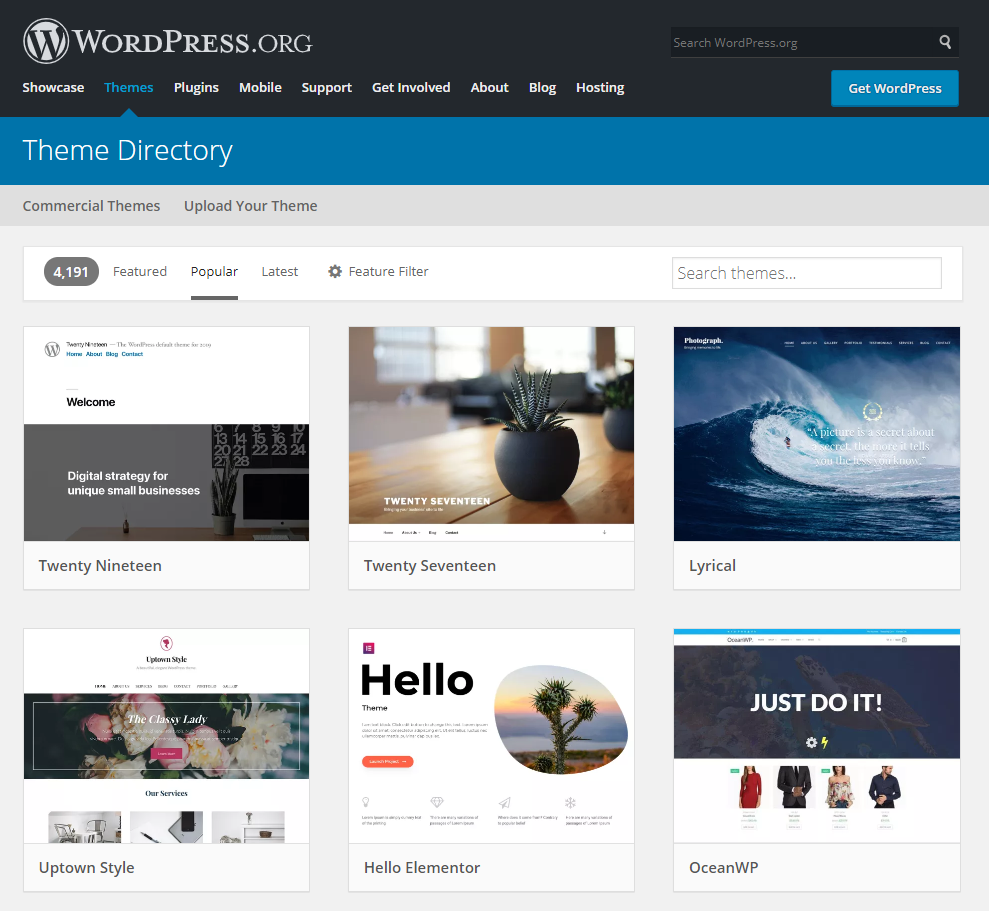
However, you can also browse and download themes from the WordPress Theme Directory to upload to your WordPress website.
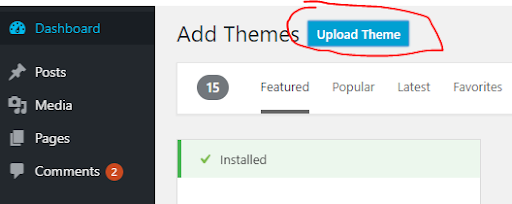
No matter which way you choose to add a new theme, you’ll need to navigate to your WordPress admin and navigate to Appearance > Themes, and then select ‘Add New.’
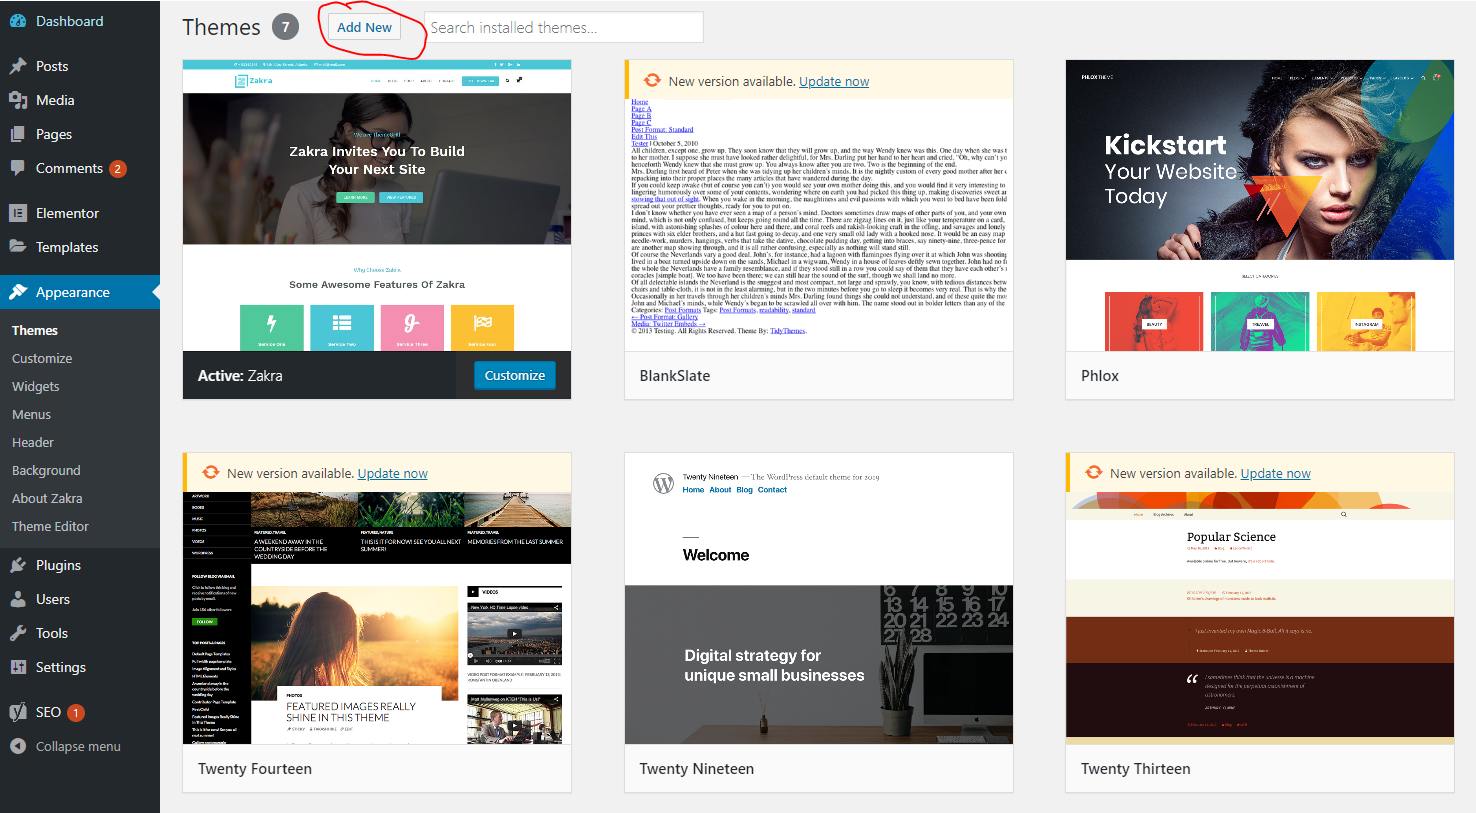
From here you can search for themes and install them without leaving WordPress. Or, there is also the option to upload a downloaded .Zip theme on this screen.
Don’t spend more than a day or two experimenting with WordPress themes. Just pick one and go or else you’ll end up like many new bloggers and be stuck in the design phase forever.
When it comes to choosing a theme, I recommend a theme design that is:
- Mobile-Friendly/Responsive (most new themes are)
- Simple & Clear
- Fast Loading
Your design does not have to be complicated. In fact, many of the most successful bloggers actually have the simplest designs.
Simple designs are not only typically easier and better for new bloggers to use, they’re also typically faster loading, which is super important for SEO and usability.
No one is going to stick around on a blog that takes 10 seconds to load per page.
I recommend choosing a simple theme and design. Focus on your content and driving readers to your call-to-action(s). A lot of new bloggers tend to overcompensate with design. Remember, you want the focus of your blog to be your content.
Recommended Free Themes:
Most free themes are overloaded with too many graphics and bells and whistles that ultimately won’t do your website any favors. Or, they’re not created with responsiveness in mind.
I scoured WordPress to find a few free themes I would recommend you install.
The Best Free WordPress Theme for Easy Customization
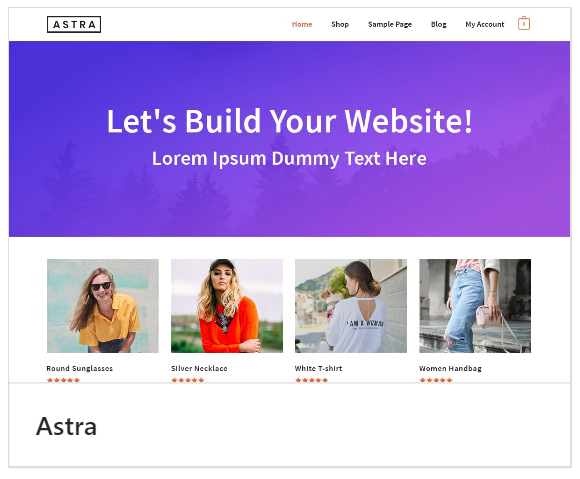
Astra + Elementor Page Builder
I highly recommend the free Astra WordPress theme. This free theme (that also has a premium option) is a great hybrid of customization and ease. To really take the theme to the next level, use the free Elementor plugin.
You can build a great started blog with these two FREE options.
The Best Free WordPress Theme for Customization
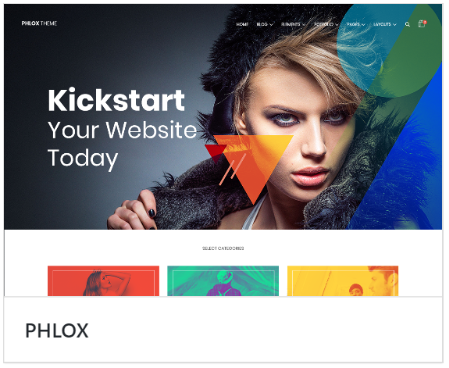
Phlox + Elementor Plugin
- A more heavyweight theme with more customization options
- This can be overwhelming for bloggers new to WordPress
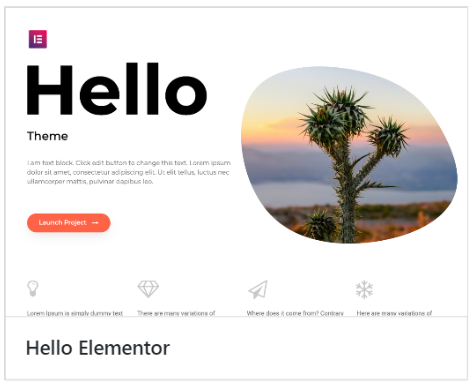
Hello Elementor + Elementor Plugin
- A lighter weight theme. If you want to spend some money on your design, I recommend spending $49 on Elementor Pro and using the Hello Elementor theme to essentially build your own theme with a drag-and-drop editor.
Elementor created this theme specifically for Elementor Pro users, however, it will also still work with the free version of Elementor.
Zakra + Elementor Plugin
- This theme is the easiest to set up if you want to get blogging ASAP
Recommended Paid Theme:
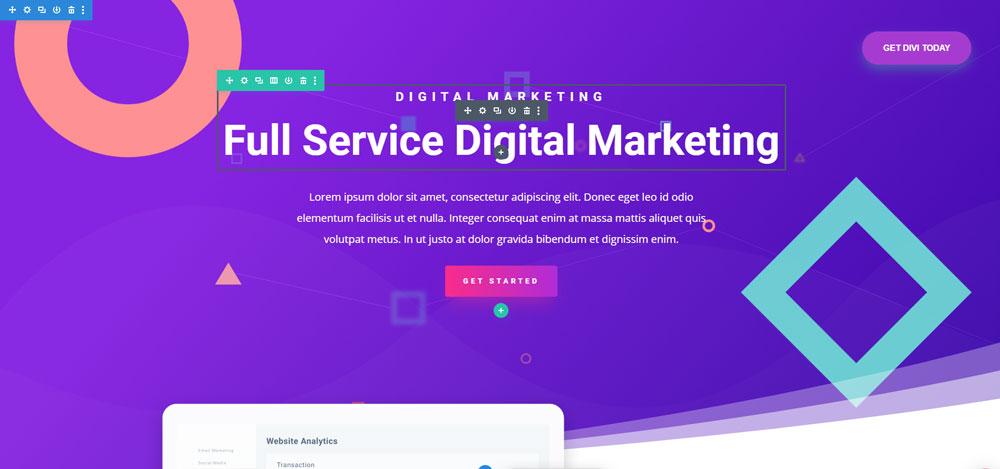
Divi
When I create websites for clients when doing freelance work I always turn to Divi.
Divi is amazing because it’s super easy to use. I can literally stand up a brand new, great-looking website, in a matter of minutes!
When used correctly it is lightning fast. And, it gives you drag-and-drop design functionality within WordPress.
This is similar to Elementor, but works much more intuitively and has better documentation and support. This is truly a pro-WordPress theme.
Note that if you purchase Divi you won’t need Elementor at all. Divi has its own (in my opinion, much better) page, builder. But, as I’ve mentioned before there is a free version of Elementor with limited features you can use until you’re ready to invest.
What theme do I use?
I’m a little different from most bloggers because I actually worked for a few years as a web developer.
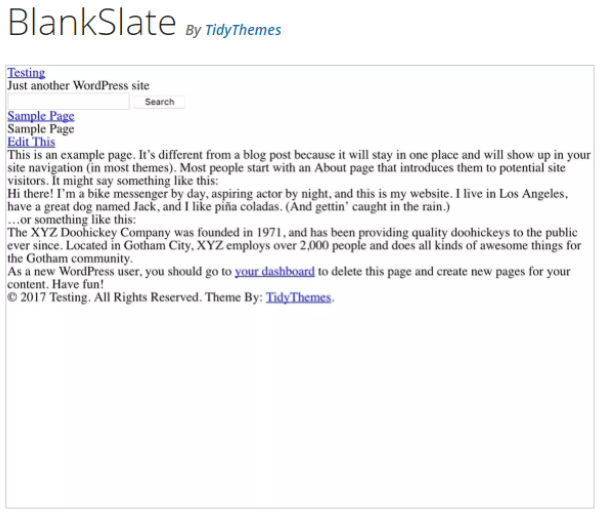
For that reason, I built a custom theme from BlankSlate as a personal challenge. I do not recommend this theme unless you are a developer with experience in PHP, Javascript, and HTML/CSS. If you install this theme, it will just look like plain text.
Installing Essential Plugins
Plugins are essentially apps for your new WordPress website. They help you do things WordPress can’t do out of the box.
There are thousands and thousands of plugins to choose from, but keep in mind they’re developed by third parties, so be careful to only install reputable plugins
These are the plugins I almost immediately install on every website:
- Elementor
If you have a free theme, the #1 plugin I recommend you install is Elementor. This is a free page building that will make it way easier to customize your layouts.
- Yoast SEO
This is a great tool for helping improve your website’s SEO (search engine optimization). If you’re interested in learning more about how to get your website listed on Google, I have a FREE course you can access here.
Beyond these two plugins, I have an entire post devoted to the important plugins I recommend for WordPress.
Step 5: Branding Your Blog
When I talk about branding your blog, I’m not just talking about your logo and the colors and fonts you choose for your blog.
Your brand is something much bigger than that, and having a strong brand can make all the difference in helping you stand out from the competition.
This is one of the biggest skipped steps I see ALL bloggers make.
Creating a blog brand that readers know, like and trust is the key to a successful brand.
To figure out your brand you need to first determine who your target audience is and who your competition is.
This will help you:
- Resonate and Connect With Your Audience
- Stand out from Competitors
Start by Creating a Customer/Reader Persona
Create a target persona of visitors you’d like to have on your website.
- Who is your ideal blog reader?
- Why are they on your website?
- What are their goals?
- How old are they?
- What everyday challenges do they face?
Conduct Competitive Research
You should know who the top 3-5 bloggers in your niche are.
- Why they are blogging?
- If they’re trying to make money what does their strategy seem to be?
- What colors do they use on their blog? What types of images?
Looking at successful competitors is really important because they’ve already figured out who their audience is. You can use this information to support your own research.
Once you have an idea of who your audience and competition is, then it’s time to think about the visual part of your branding…
Choosing Your Blog Colors:
This is my first step when it comes to actually designing my blog because it is the foundation of my logo and images.
Here are some tips:
Pick colors that match your brand personality.
- If you’re a ‘fun’ brand bright colors will fit your blog well.
- For sincere bloggers, pastels and muted tones are a great choice.
- Competent and sophisticated blogs might want to stick to simple black & white.
- Don’t follow the crowd. Try to use colors that competing bloggers aren’t using.
Choose Only 1-2 Colors.
Think about the most well-known brands in the world. When you think of their colors, there are usually only one or two.
- Coca-Cola (Red & White)
- Nike (Black & White)
- Pepsi (Red & Blue)
- UPS (Brown & Gold)
- Starbucks (Green & White)
- McDonald’s (Yellow & Red)
- Dunkin Donuts ( Orange & Pink)
- Target (Red & White)
The reason for this is, it’s much easier to be memorable when you only pick one or two colors.
Choose Complementing Colors
Choosing colors on opposite sides of the color wheel is a great choice for bloggers because you can use one color as your main color, and the opposite color as your call-to-action color.
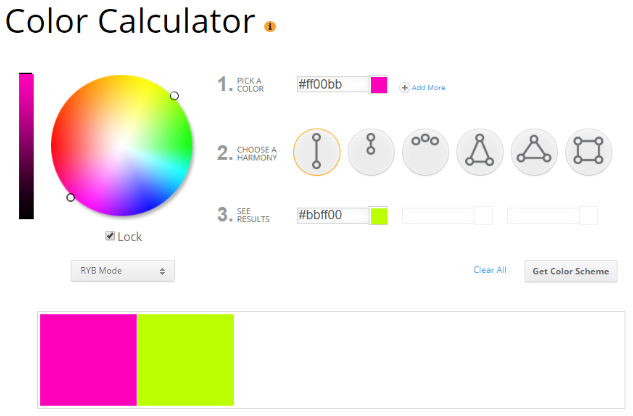
Use Free Online Tools to Help You Create a Color Scheme
I like to use free online color calculators, like this one from sessions.edu to generate my color schemes.
In this example, I’ve chosen complementary colors. When you’re done, make sure to take note of the Hex code, as you’ll need to use these to modify your chosen WordPress theme.
Create a Custom Logo
This is the first thing most new bloggers think they need when they start a blog. Personally, I don’t think an amazing logo is super-important, but something simple and professional will give your blog more credibility.
If you have no design when it comes to creating a logo, you have a couple of options.
You can create a basic logo that will work great in less than an hour. How?
What I generally do is just find a free commercial font online. I like 1001fonts.com, and find something that matches the aesthetic of my blog.
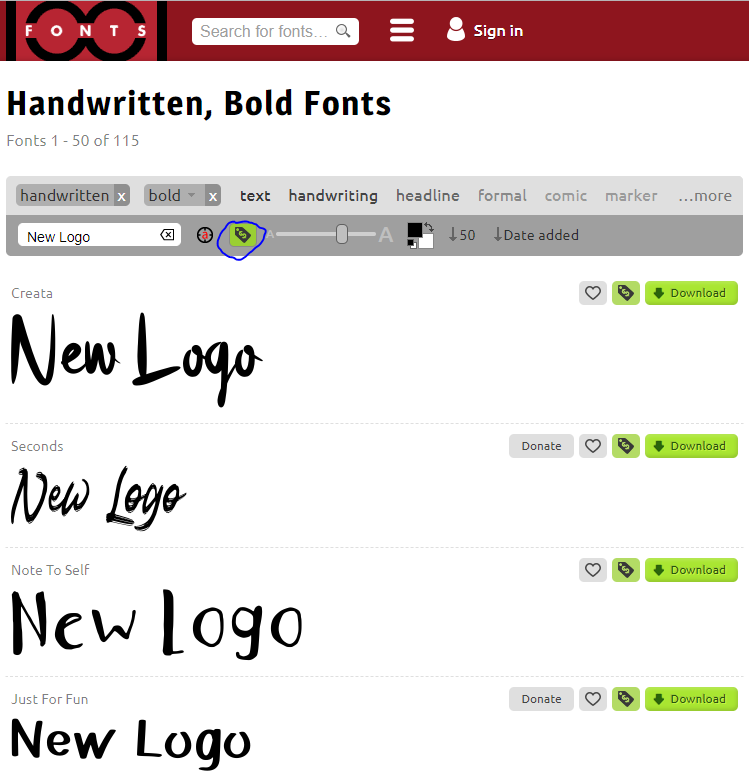
After downloading a unique font you like, you can use a free program like Paint (Microsoft) or Gimp to create a simple and unique logo.
Alternatively, if you’re a Canva Pro user you can also upload a custom font and create your custom logo with this program.
Regardless, I almost always use a unique font as the basis for my logos.
The second option is to purchase a logo.
Using services like Fiverr for logo design makes creating a custom brand logo faster, cheaper, and more accessible than ever before. This will cost money though, and finding a decent logo designer will probably be at least $15-40.
Choose Unique Fonts for Your Blog
Out-of-the-Box, most WordPress themes use pretty basic web-safe fonts like Arial, or Times New Roman. These fonts produce a pretty bland look because we’re used to seeing them ALL the time.
What I almost always do is use Google’s free Open Source font library for my fonts.
Many themes will allow you to pick from Google Fonts automatically, but if not there are some free easy-to-use plugins that can help you install these fonts easily.
I produced an article of 20+ great font pairings for bloggers using Google Fonts which outlines some great Google Fonts as well as how to install them on your blog.
Step 6: Creating Content
After creating your main homepage, you’ll need to begin filling up your blog with other types of content.
When it comes to creating your website, there are two main types of content you create.
Posts and Pages.
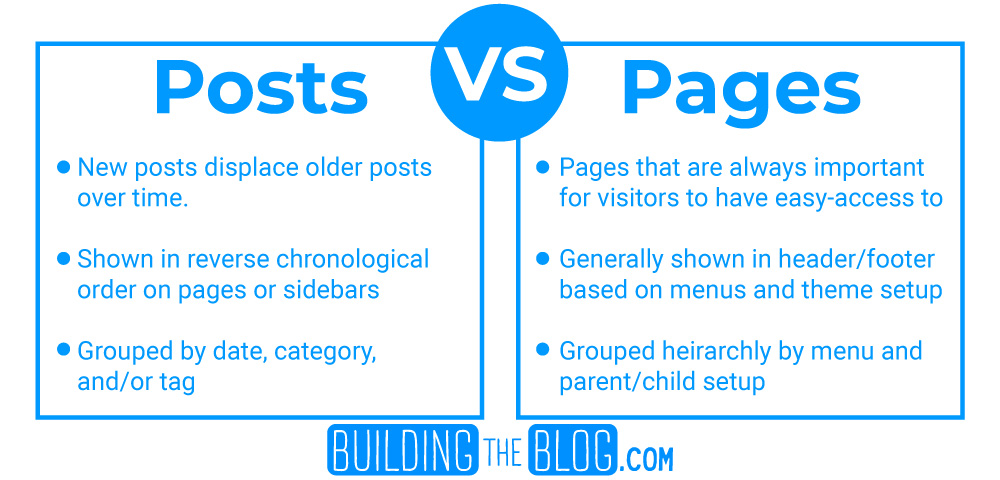
Pages are the pieces of content that are long-term to your blog. These generally show up in your header and footer menus.
Standard page examples include:
- Homepage
- About Page
- Terms & Conditions*
- Privacy Policy*
- Disclaimer*
- Sign-Up Pages
* If you’re collecting information or trying to make money online you will likely need these ‘legal’ pages. I’m not going to be giving legal advice here, but you can easily use Google to find free templates for these pages online.
Posts are more traditional blog content. Generally, these are displayed on your homepage or blog page in order of most-recent to least-recent.
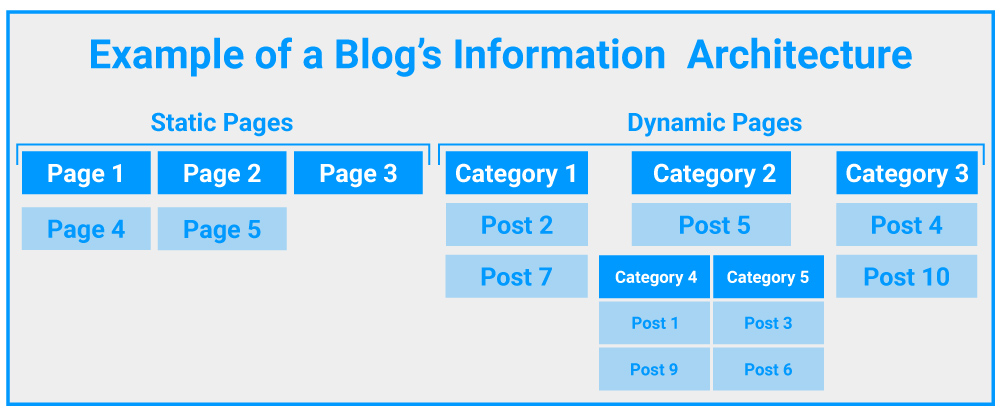
Pages and posts are also organized differently. Pages are static and grouped as parent/child pages.
Posts are grouped topically based on how you define a post’s category and tags.
In general, when you create new blog content based on your topic, you’ll want to create a blog post.
Getting Started with Writing Your First Blog Post
For most blog posts I write, I start with some form of keyword research. This not only helps you come up with new ideas but also verifies that they are ideas other people are interested in!
I do keyword research for both Pinterest audiences and Google/organic search audiences.
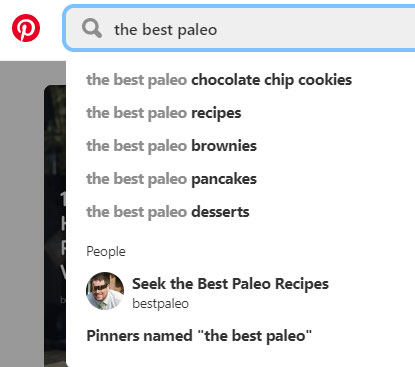
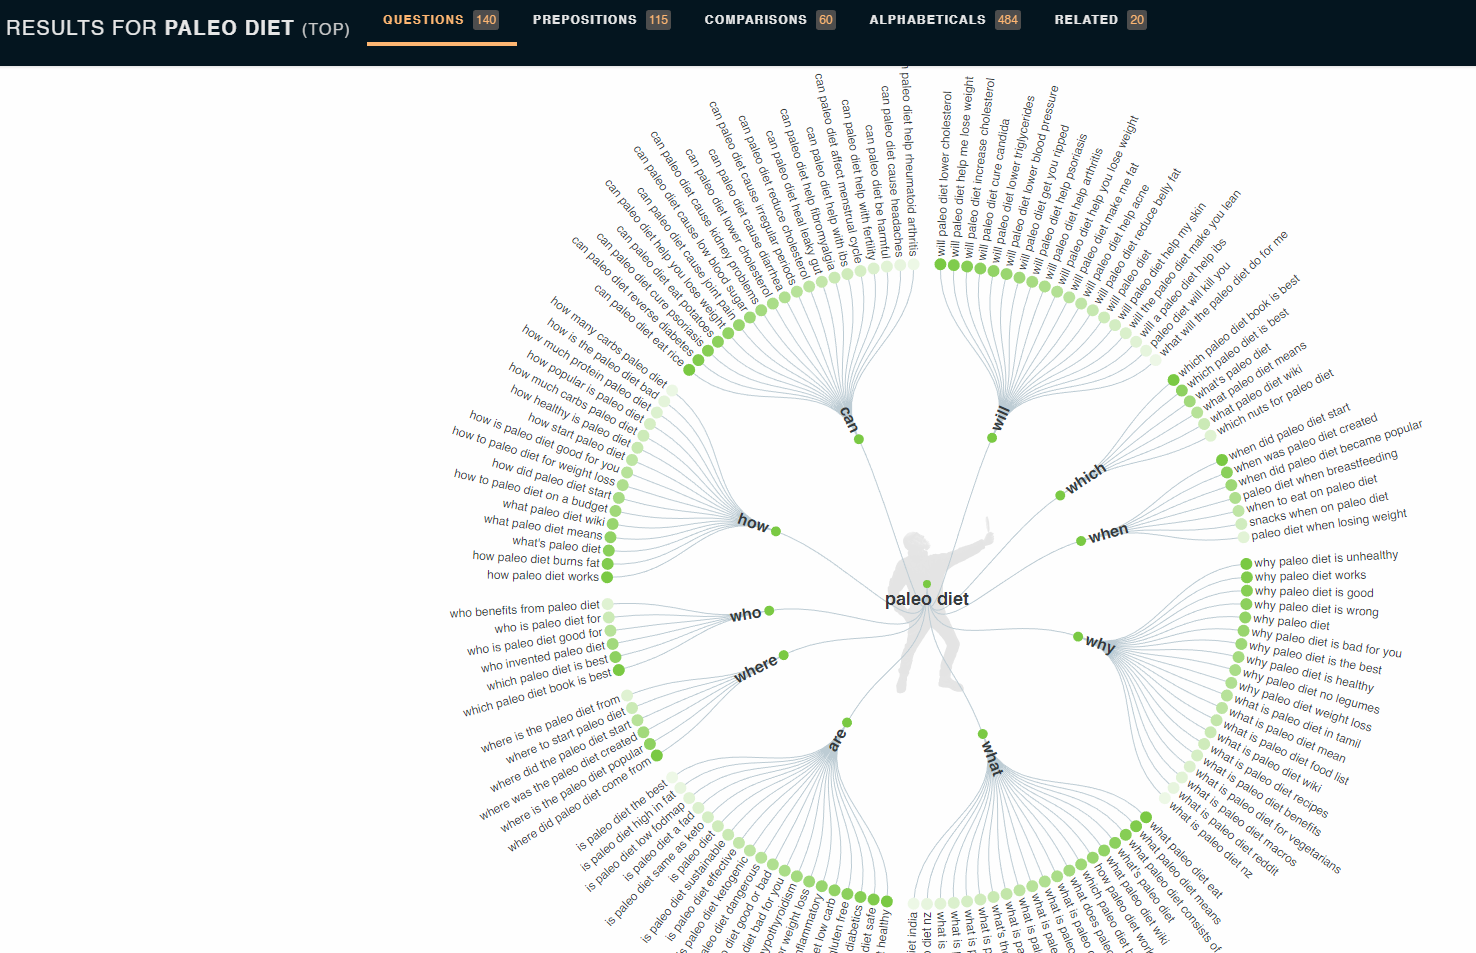
With Pinterest, the keyword research I do is as simple as seeing what autocompletes for certain keywords. Here’s an example for a Paleo themed blog:
The method I use for Google search uses either a free (UberSuggest) or paid (SEMRush) tool that predicts search traffic on Google based on historical data.
This method gives you much more information than the Pinterest method.
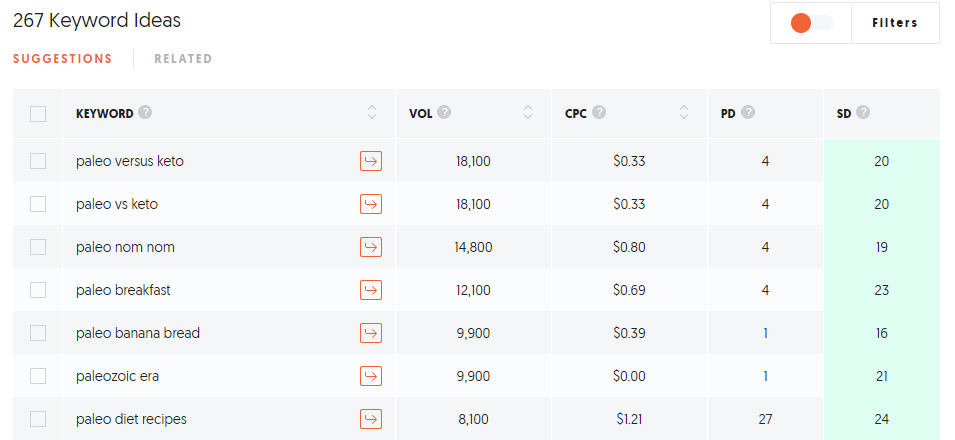
The key here is to look for keywords that both get a decent amount of searches a month (my absolute minimum is 500) and are realistically rankable on Google.
Here’s an example from Neil Patel’s UberSuggest on a search for paleo keywords with a max of 20 SEO difficulties (out of 100).
I’ll get into this a little bit more in Step 7 of this guide (Generating Blog Traffic).
But, my main point is that writing blog posts around content your target audience is interested in is key to your success.
Once you have a target keyword and topic in mind, the next step is to outline your content.
What do you want to say? Create some bullet points to outline your thoughts. Remember to include the “why.”
If you really want to make people care about what you’re writing – remind them why it’s important and how it can help make their lives better!
I also highlight recommend using free tools like lsigraph.com and answerthepublic.com to find keywords related to your topic. This will help you create a more comprehensive blog article that also has better-optimized SEO content!
Using the WordPress Post Editor
The WordPress post editor is pretty intuitive to use. When you create a new post you’ll immediately want to make sure to change your URL and blog title to include your target keyword.
We’ll get into how to write a great blog title in a second.
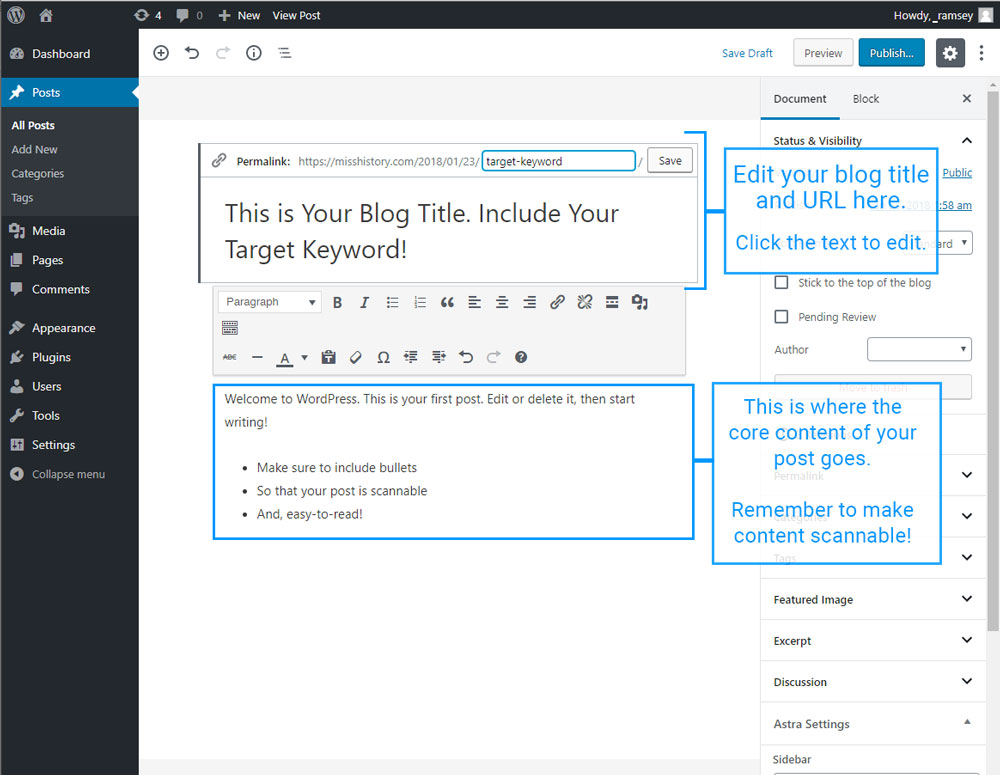
Keep saving as a draft and previewing before hitting publish. As soon as you hit publish the blog post will go live on your website.
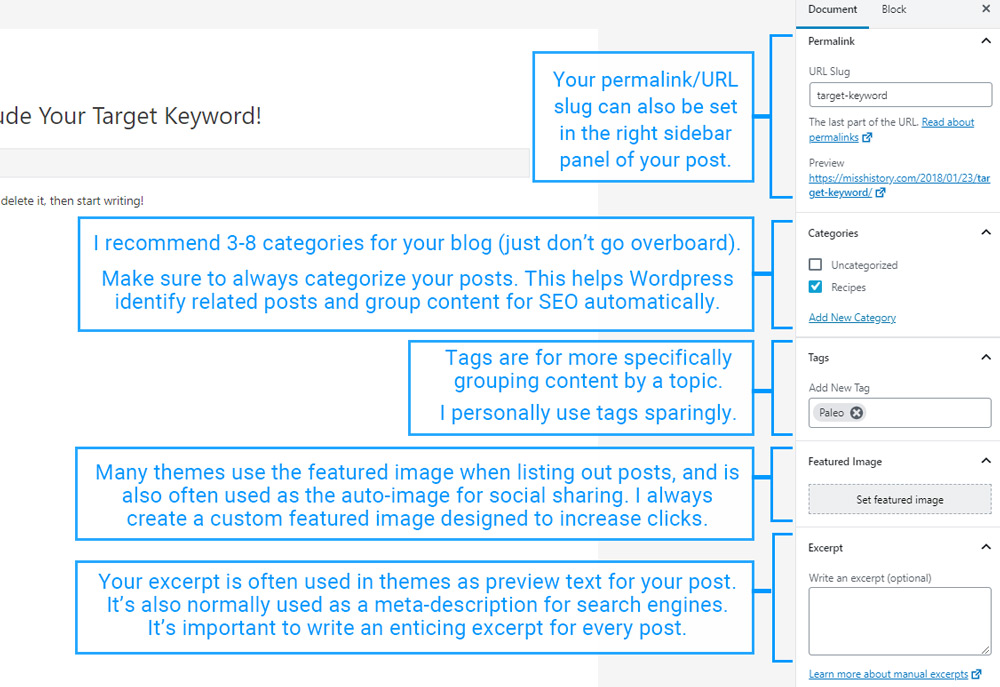
Also, it’s important to not just write a great post, but also optimize the settings of your post on the right sidebar of each post.
Those are the basic features of the WordPress post editor. For the most part, WordPress is pretty self-explanatory though, and works like a basic text editor.
Now, you might be wondering how to create content that your readers actually care about?
This all starts with an enticing blog post title…
How to Write an Amazing Blog Title
First and foremost, if you’re trying to rank on Google or make a viral pin centered on a specific keyword, make sure your target keyword is in the title of your blog post.
Now, to increase your click-throughs on an article, a great free and easy tool I use is CoSchedule’s headline analyzer. This isn’t a perfect tool, but it will give you some ideas on how to improve your headlines.
Other proven ways to increase the clickthrough rate of your blog title, include:
- Use action words (i.e. Start, Learn, How to, Do this, etc.)
- Ask questions to increase the curiosity of the reader
- Include numbers in your title (i.e. 5 Ways to…)
- Aim for a character count of 50-60
How Long Should Your Post Be?
There is no silver bullet answer here. If you’re looking to compete on Google my best recommendation is to look on Google look at the top three ranking articles using a word count tool and then calculate the average word count of those three posts.
That will tell you the minimum length you probably should aim for to be competitive for that specific keyword.
I personally try to keep my articles at 1,500 words at a minimum, but that’s more because I try to be as comprehensive as possible in every piece of content I create.
Make Your Blog Posts Engaging
One thing a lot of beginner bloggers struggle with is making their blogs engaging. This is SUPER important to keep readers on your website.
As you’re writing your content, keep in mind that many of your readers are going to scan through your posts. That’s not a bad thing – that’s just how many people consume content online to avoid information overload.
To help your readers, make sure that you include lots of:
- Bullet Points
- Bold text that highlights important points
- Highlighted bold text that indicates your text is REALLY important
- Images & graphs that illustrate your point in a visual manner
- Video (but don’t autoplay any media!)
Also, avoid long paragraphs and walls of text.
If you have a blog of text that’s more than 4 lines long, it’s much less likely to get read. People don’t like to read walls of text online.
Always Have a Goal in Mind
There are a variety of reasons to write a blog post, but the most successful bloggers are writing each blog post with some sort of goal in mind.
Pro bloggers have something in mind they want their audience to do after (or during) reading the blog post.
This is called a call to action.
You’ve probably noticed on other bloggers’ websites, forms to subscribe to their blog or to download a free ebook related to the post.
Keep relevant calls to action in mind as you create each post.
Step 7: Generating Traffic
Ok, so now that you know how to create a blog and get started writing content you may be wondering… how do I actually get people on my website?
Well, I can assure you, a blog isn’t like the Field of Dreams. If you build it, they will (unfortunately) not come…
You’ll need to proactively work to build traffic to your website, especially in the beginning.
Think back to the target persona we talked about in our branding step. Where does this person hang out online?
For example, a lot of female health and fitness enthusiasts use Pinterest, whereas their male counterparts are probably more likely to be found on Reddit or YouTube.
Keep your target audience in mind as you’re working to build traffic to your blog so you know which strategies and channels to focus on first.
Ultimately a layered, diversified traffic building strategy will be best when it comes to having consistent traffic on your website.
Social Media Sharing
Your personal Facebook, Twitter, and Instagram accounts can be a great place to gain your first readers.
Even if you don’t have thousands of friends or followers, this is a great way to get constructive feedback on your blog from a friendly audience.
Advertising
This is the easiest way to get people on your website, but it’s expensive. It’s probably not ideal for a brand new startup blog.
However, Facebook, Instagram, and Pinterest advertising opportunities are something to keep in mind as your blog grows.
The thing nice thing about advertising is, you can turn it on and off very quickly if ad isn’t working well. And, advertising isn’t only good for generating traffic, you can also use advertising to test different headlines and messages to see what resonates best with your target audience.
Search Engine Optimization (SEO)
Search engine optimization can be an overwhelming concept for new bloggers, but it’s pretty simple at its core. The basic idea is to create the best content for Google around specific keywords you’ve targeted.
SEO is a great strategy, and I recommend new bloggers be aware of what it is and how to get started optimizing each post for SEO.
To learn more, check out my blog post “What is SEO? A Non-Technical Beginner’s Guide for Bloggers”
However, SEO is more of a long-term strategy. It’ll take months and sometimes years for your hard work to pay off, but it’s good to get in the habit of writing for SEO because you never know when a post can start bringing in tons of organic traffic.
And, even if SEO won’t pay off right away, it’s a great way to make your blog traffic more diversified over time.
I personally am just getting started with Pinterest search marketing, My background is in traditional SEO and PPC (Google AdWords, Facebook Ads, Pinterest Ads, etc.). However, many bloggers swear by this traffic source.
Especially, if you have a largely female audience, chances are this can be a great traffic source for you. And if you have a male audience, Pinterest’s male users are increasing more and more every day!
The basic idea behind using Pinterest marketing is to build up your follower count by pinning to multiple board every day.
Around 30-40% of these ‘pins’ should link to your own content. You can create multiple ‘pins’ for your blog by posting to more than one board related to your chosen pin.
Guest Blogging/Link Building
Reaching out to other bloggers of similar sizes can be a great strategy.
And, if you can find bloggers that are of similar size and in non-competing but similar niches, this is a win-win strategy for gaining exposure. And, it helps you build connections in the industry.
One caveat to guest posting, make sure not to spam or allow spam on your website. The goal of guest blogging is to provide meaningful content to a new audience and hope they connect with you and go to your website to learn more!
Quora/Stack Exchange (Forums)
Start answering questions on question websites like Quora.
Link Internally
Don’t forget about the traffic on your own website! Part of your traffic strategy should be not just to gain new traffic, but to keep your readers on your website and engaged with your content.
The more time someone spends on your website the better.
As a result, new visitors will be more likely to remember, like, and trust, you enough to subscribe to your blog or purchase a product.
Step 8: Building Momentum
Analyze Your Blog Traffic Over Time
Before you launch your blog, don’t forget about metrics!
You’ll want to track the growth of your blog over time so you can see where your traffic is coming from, what content is most popular, and where readers tend to exit your website.
I recommend all bloggers take advantage of Google’s two free traffic analysis tools.
- Google Analytics
- Google Search Console
Build a Subscriber Base
Make sure to immediately start collecting emails.
Stay consistent.
Create a blog posting schedule you can stick to. At a minimum, you should post once every two weeks.
Get organized.
I use the free Asana productivity tools to keep track of my blog post ideas as well as priority posts.
Don’t give up too soon.
It’s going to take a while to build momentum on a brand new website.