In this tutorial, you’ll learn how to create a favicon for free using Canva and how to add it to your WordPress website – in just 5 steps!
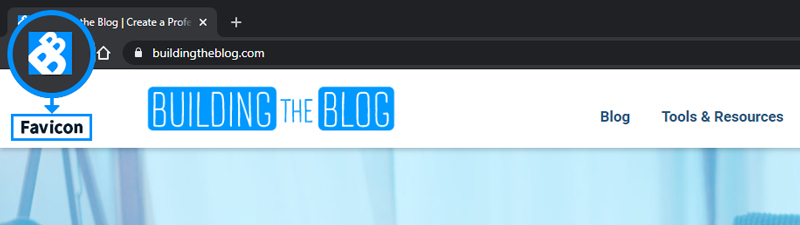
A favicon is a small icon that represents your website and is most commonly seen in browser tabs.
Where Else does a favicon appear?
In additional to browser tabs, most modern browsers, like Chrome, Safari, Firefox, and Edge, also display favicons in:
Bookmarks (links added to your browser’s favorites/bookmarks)
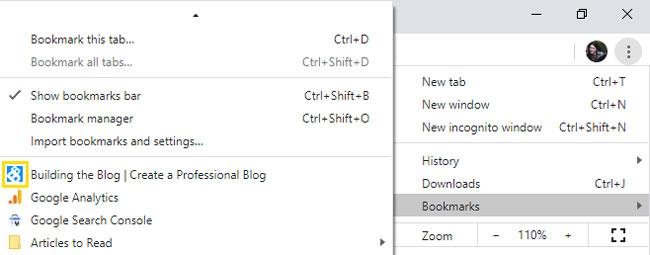
Bookmark Bar (quick links added to your browser under the URL bar)

Address Bar Dropdown (shows up when you start typing in a URL)

Outside of browsers, search engines are now also starting to display them as part of search snippets:

Why Do You Need a Favicon?
A favicon is a must if you want your website to look legit and professional. and, it’s a great (and easy) branding opportunity.
Additionally, according to SEO experts Moz.com, not having a favicon on your website is one of 27 signals that a website is spammy.
In other words, they’ve found that non-spammy sites are more likely to have a favicon than spammy sites.
The good news is, creating a favicon is easy!
If you follow along with this post, you should be able to create and add a favicon to your WordPress website in less than an hour.
How to Create a Favicon
A favicon can be added very easily with a WordPress website, but first, you need to create your favicon.
In this tutorial, we’re going to use the free online design program Canva.
To begin, visit canva.com and sign up for a free account if you haven’t already.
From here you’re ready to begin!
Step 1: Create Your Custom Canvas Size
All favicons are square format, or 1:1 format ratio and WordPress recommends that they be uploaded at 512px by 512px.
This means you’ll want to create custom dimensions in Canva to match these specifications…
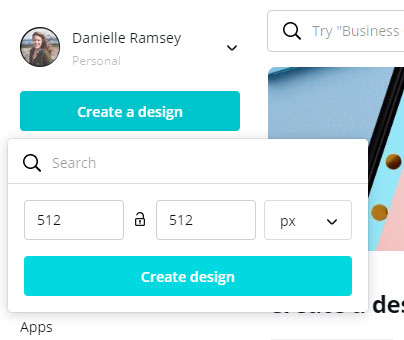
To begin your design, you’ll want to click the button “Create a design” and then choose the “+ Custom dimensions option.”
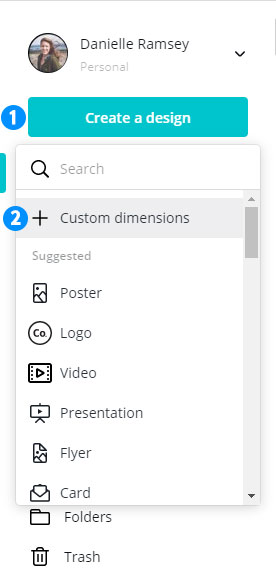
Next, you’ll want to type in your custom dimensions size. Type in 512 by 512 px. This is the size that WordPress recommends for your favicon.
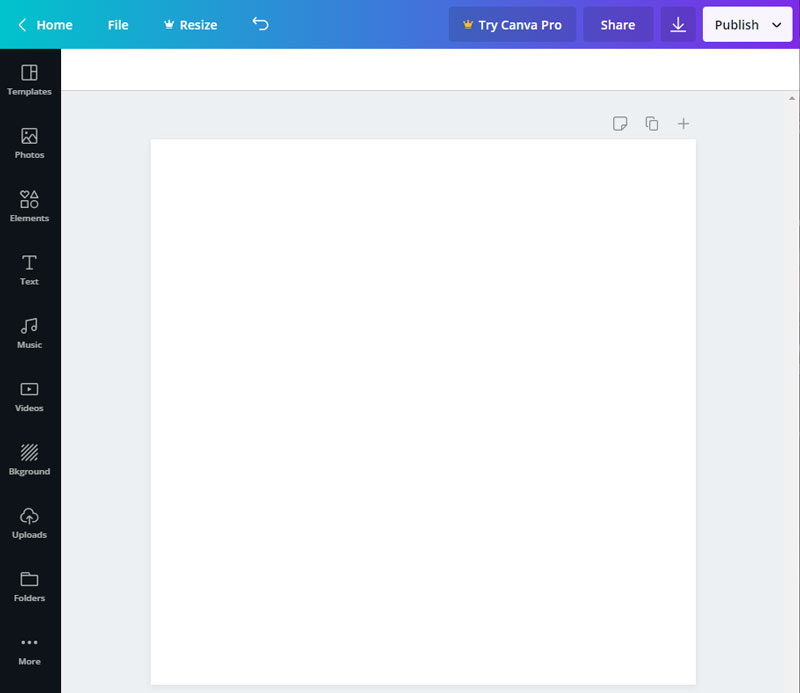
Now, you have a blank canvas to create your favicon!
Step 2: Set Your Background Color
The first thing you’ll want to do before adding your main artwork is set your icon’s background color.
I recommend selecting your blog brand’s main color for your site icon.
A white background tends to blend in to many browser tabs, where a color icon will pop and stand out more.
In this example, I’ll be creating a favicon for the fictional travel blog “Wander Lustie” which has a main color of salmon (#ff7a57).
To change the background color simple click the canvas – it will highlight and then a color icon will appear for you to click.
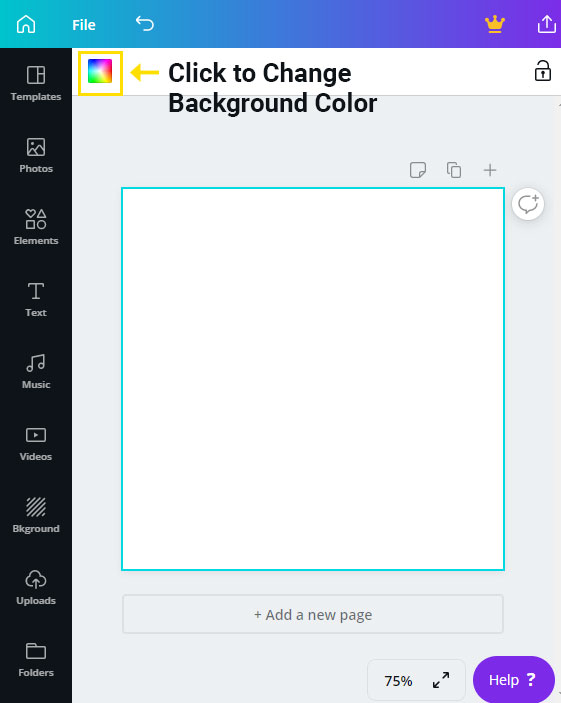
Now, you’ll have the option to choose from some basic preset colors. But, if you have your own brand color, you can click the “New color” icon and type in your hex code:

Step 3: Add your Main Artwork
Now it’s time to add your main artwork. One thing you really need to keep in mind is, even though you’re uploading and creating your artwork at 512px by 512px, the icon is most often viewed at the much smaller size of 16px by 16px.
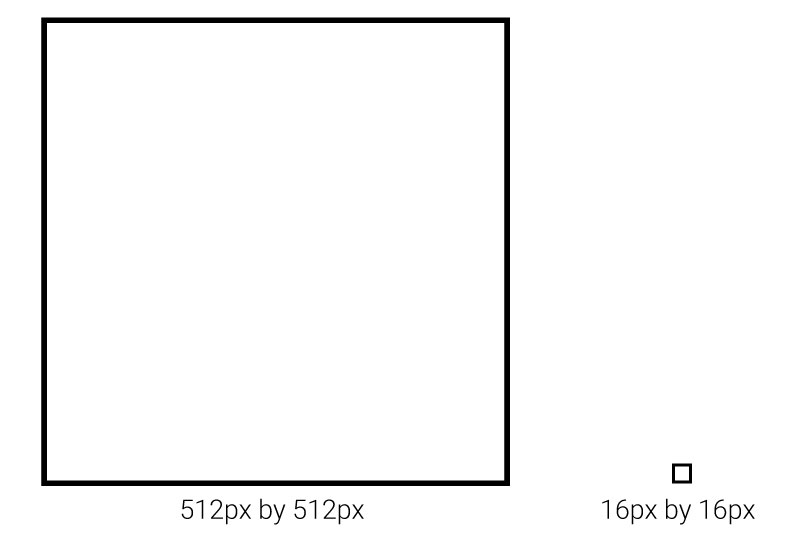
That means you need to keep your design super simple – details will be lost.
With that in mind, I recommend one of two techniques.
- Use text for the abbreviation/acronym of your blog’s name, or
- Add a simple one-color “element” or icon from Canva
First, let’s start with technique number 1.
If you go this route, you’ll want to create a new text box for each letter. This will give you the freedom to easily rotate and resize different layers.
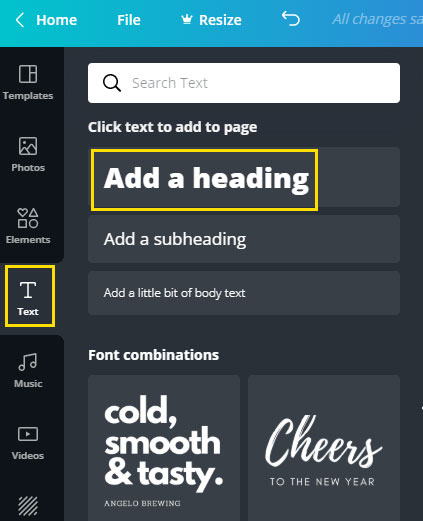
To do this, click the Text > Add a heading button for each letter.
From here, click on your letters and change the font, size, and color options to your liking.
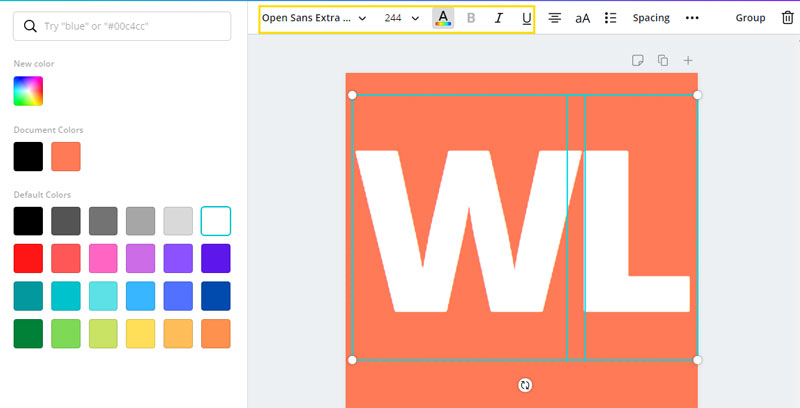
From here, try making one letter larger than the other, overlapping letters, rotating letters, just experiment until you get a look you like.
And, remember you don’t have to color inside the lines! Feel free to extend beyond the edges of the canvas to give your text a more unique look.
For technique number 2, search for a free icon related to your niche. Make sure it’s simple. I also highly recommend one-color icons. Stay away from complicated clipart.
In my example, I’m creating a favicon for a travel blog, so I’m going to search for elements related to “travel.”
Note that in Canva, any icon with a crown symbol requires Canva Pro, and a $ symbol means you’ll have to pay extra whether you have Canva Pro or not .
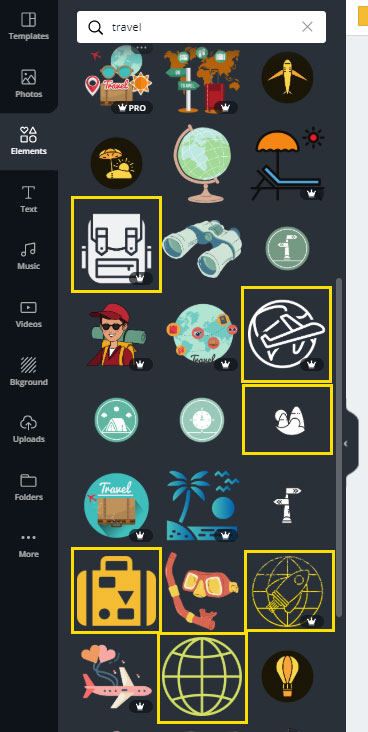
You may have to search a while to find an icon you like. But, remember once you add it to your canva you can change the color by clicking on it.
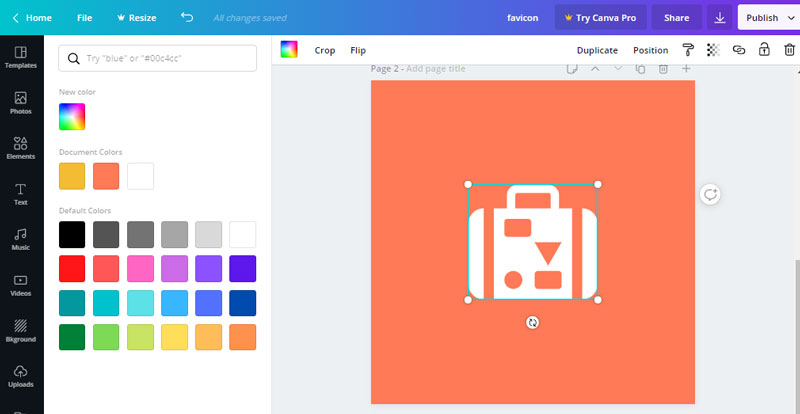
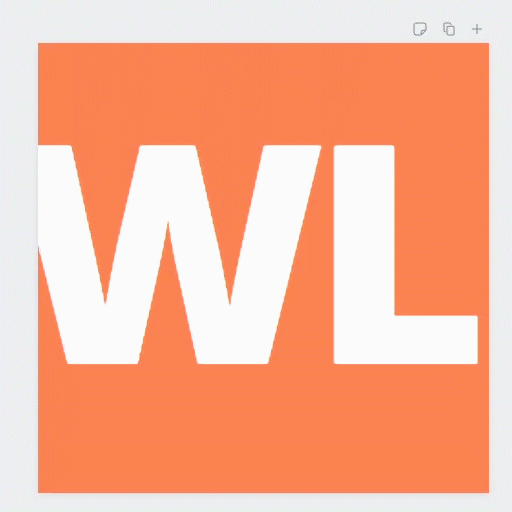
From here, you’ll want to make your icon fill up most of your canvas to ensure it’s easy to distinguish at smaller sizes.
You can check to see how your icon looks at smaller sizes by choosing the magnification level in the bottom right of the page.
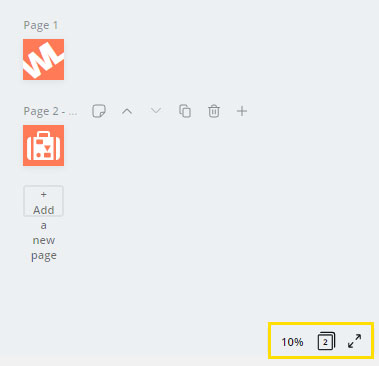
10% is the smallest you can go, but 16px is technically 3.125% of 512px, so even at 10% you’ll be viewing your favicon at more than twice the size it will be shown in browser tabs.
This means if your icon is hard to read at 10%, then you need to simplify it because it will be even harder to distinguish as a favicon.
Step 4: Download Your Artwork
Once you have your icon designed the way you like it, you need to download it from Canva.
To do this, simply click the download icon in the top right of your Canva design page.
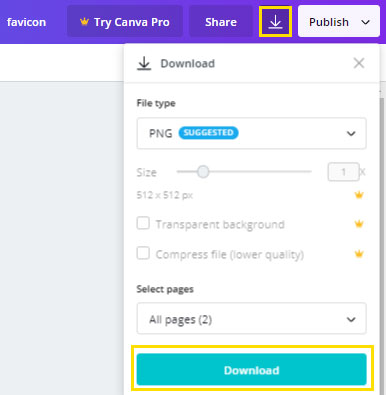
Make sure to choose the png file format – that’s what’s preferred by WordPress.
Now that you have your favicon created, it’s time to add it to WordPress…
How to Add Your Favicon to WordPress
The good news is, WordPress does most of the heavy lifting for you.
And, for the majority of WordPress themes, you’ll be able to add your icon to WordPress following these steps.
Step 4: Go to WordPress and Edit
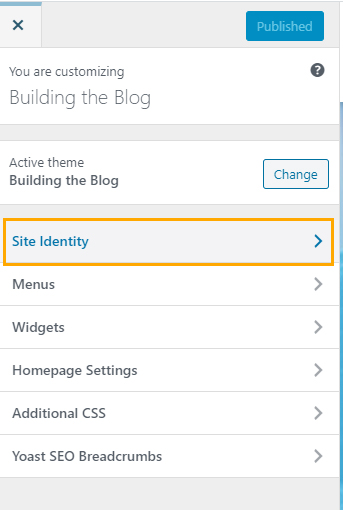
Next, go to the admin section of your WordPress website.
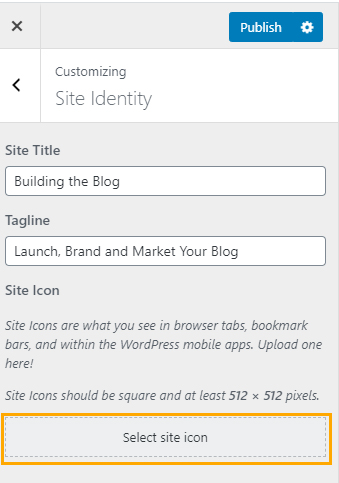
You’ll need to get to the Appearance menu. To do this, go to Appearance > Customize.
From here you’ll want to choose “Site Identity.”
Once you get here, all you need to do is upload your newly created site icon to WordPress and you’ll have a new Site Icon/ Favicon for your website.