Want to know what search terms your website shows up for on Google?
How about how often people are clicking on your search terms when they appear?
Or maybe, you want to know if you’re showing up for a specific keyword?
Google Search Console to the rescue!
This completely free analytics tool is one of the most undervalued and underused SEO tools.
Before you even get started with using Search Console you need to set it up for your website. If you haven’t done this already, read my post on how to set up professional analytics for your blog. This post covers in detail how to install both Google Analytics and Google Search Console on your WordPress website.
Once Google Search Console has access to your website, there are three key things you can use Google Search Console for to boost your SEO efforts:
- Analyze Current Performance
- Maximize Your Website’s Coverage on Google
- Make Changes to Your Website Content Based on Search Console Insights
Evaluating Your Search Performance
This is where you’ll really be able to gain insights to help you improve your SEO rankings.
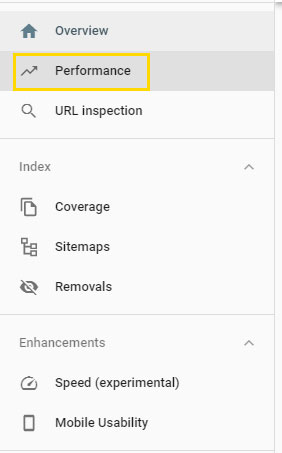
To access your search performance report, click the Performance link on the left sidebar.
If your blog or website has been around for several months, then you should have some great stats to give you tons of insight into your search traffic.
Here’s an example of the first thing you’ll see on the performance report.
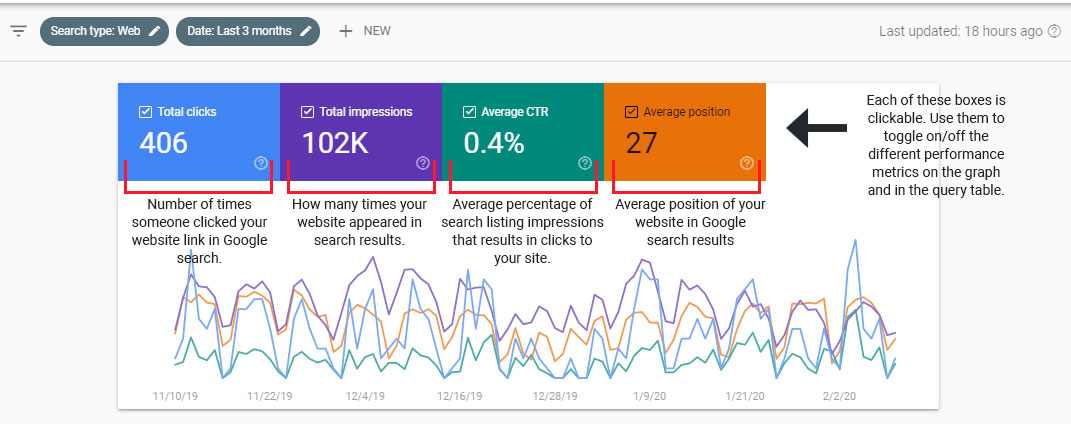
Immediately you’ll see a line graph with data around ‘Total Clicks,’ ‘Total Impressions,’ ‘Average CTR’, and Average position.
Here’s a quick rundown of what the performance metric terms mean:
- Total Clicks represents the number of times someone clicked on your website link in Google Search.
- Total impressions are the number of times your website was seen on Google Search (but not necessarily clicked on).
- Average CTR (Clickthrough Rate) can be calculated by dividing total clicks by total impressions. Represents how often your search listing was clicked when it showed up in search (higher is better).
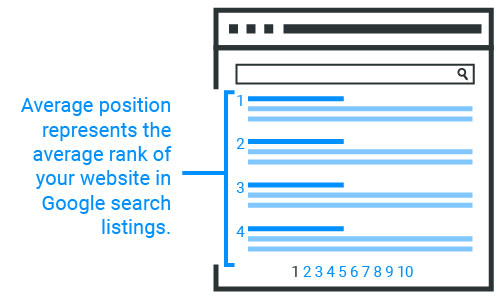
- Average Position represents the average position of all listings of your website in Google search.
As you scroll down on the performance report, you’ll see the “Queries” table.
This is a complete list of the search terms your website showed up on Google for.
Note that by default not all of the performance attributes will show up in the Queries table.
Click the boxes at the top of the page to toggle the different attributes on and off to focus on different data.
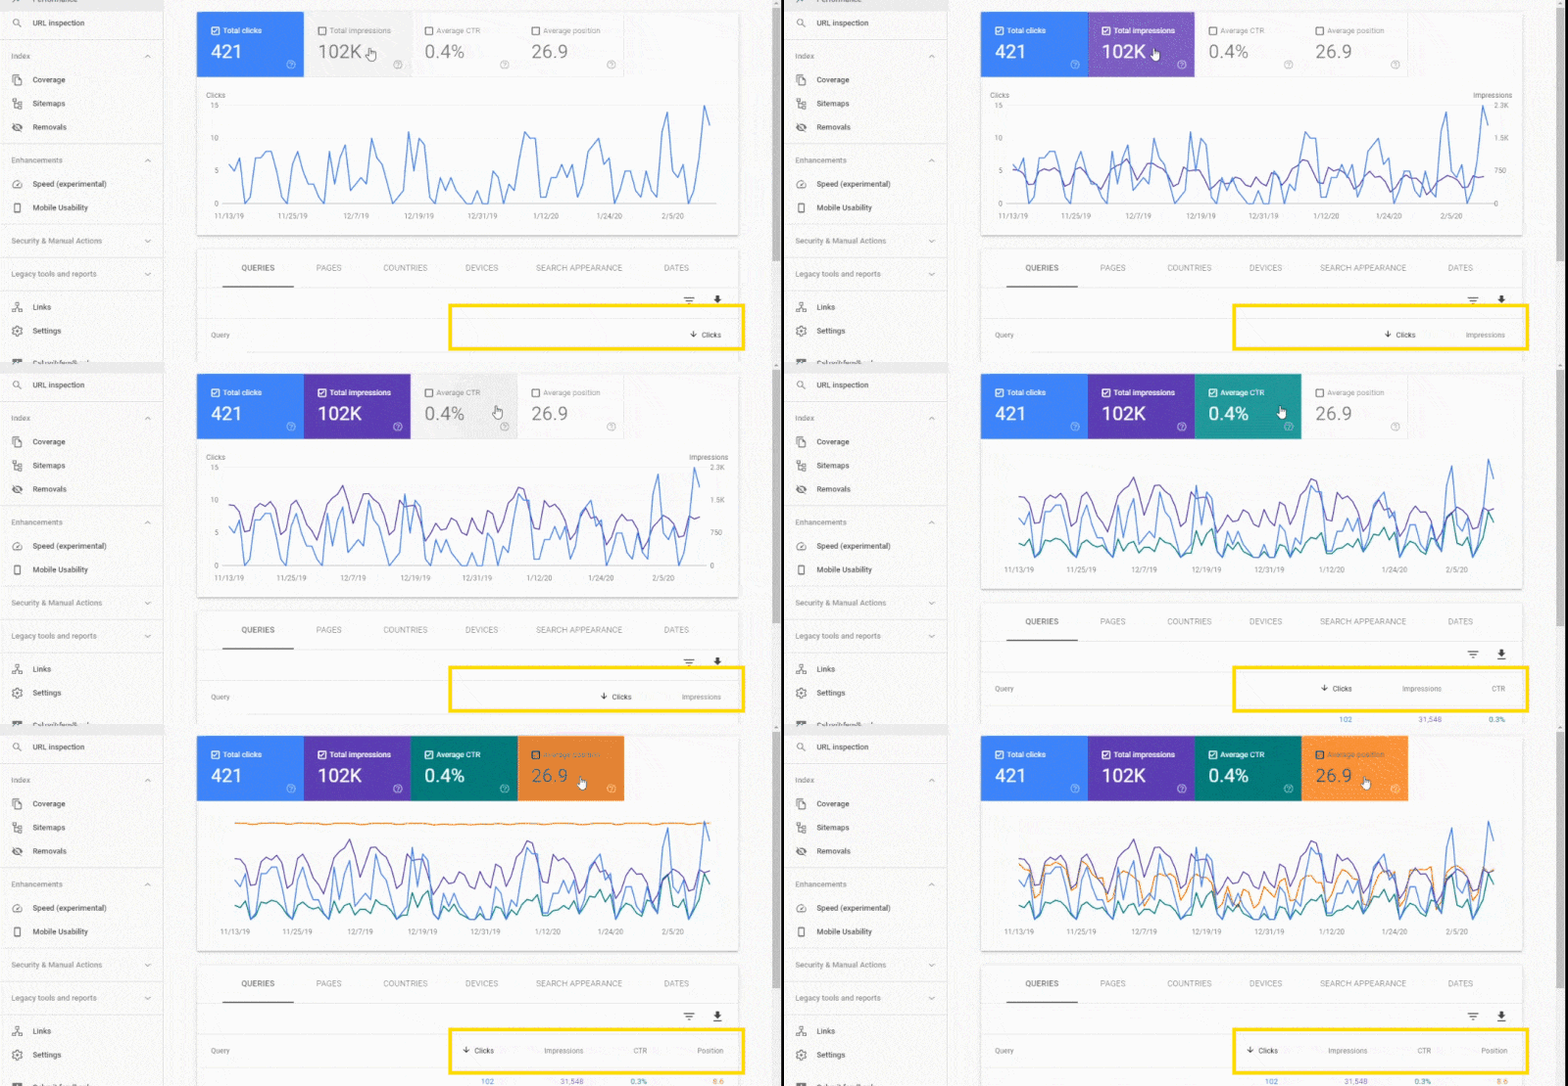
You can also sort by Clicks, Impressions, CTR, and Position by clicking on the header labels.
The amount of data presented to you can quickly get overwhelming, especially if your website is older and has lots of content.
Luckily, filters make analyzing this data much more manageable. But before you start using the filters you should have some specific goals in mind.
When I’m analyzing my Google Search Console Performance Report I look for 4 key things:
- To see how my overall performance has changed over time. Are my SEO efforts working? Am I seeing any improvement? Also, are there any huge jumps in change?
- Check the performance of my target keywords. These are the keywords I chose to create content around thanks to keyword research. I want to know if my hard work is paying off or if more adjustments need to be made.
- See which keywords (if) any are showing up for my cornerstone content. Often you create cornerstone content with a target keyword in mind. But, sometimes unexpected keywords can show here as well…
- Identifying high position keywords with low CTRs. This is low-hanging fruit. Often by altering the title tag and meta-description, you can really boost the amount of traffic you get from these keywords.
How to Check on the Performance of Your Target Keywords
Filtering is where things get really powerful for Google Search Console. If you’re doing SEO the right way, you should be targeting keywords through keyword research.
Currently, there are five different filter types.
- Query (Keyword)
- Page (URL)
- Country
- Device (Mobile/Tablet/Desktop)
- Search Appearance (Video/Web Light – I personally never use this filter)
I use the Query and Page filters the most.
- The Query filter is useful for finding out if you’re ranking well for your target keyword.
- The Page filter is useful for finding which keywords are leading users to a specific page you’re trying to drive traffic to. (More on this filter later…)
To find out how your target keywords are performing you’ll want to create a filtered query report. This is super simple to do!
Start by clicking ‘+ New’ at the top of the performance report.
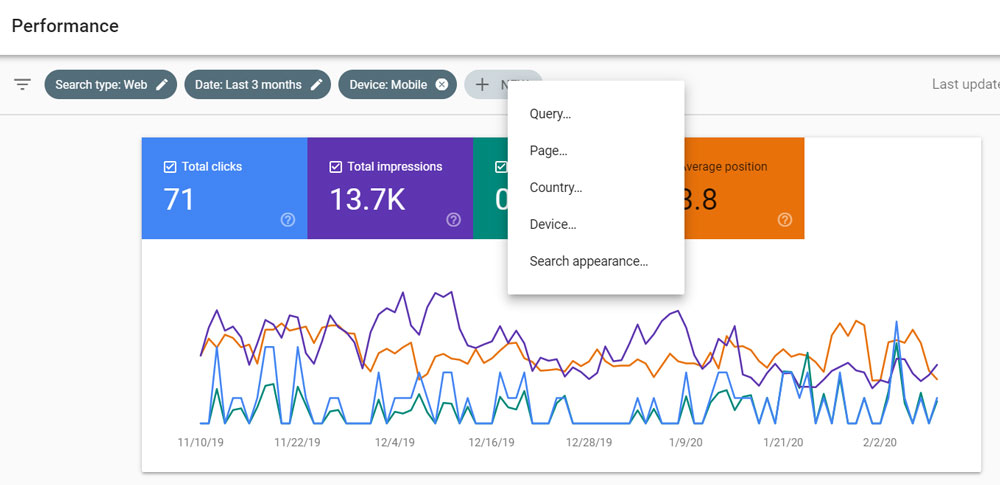
Next, choose the “Query…” option to check for your target keyword.
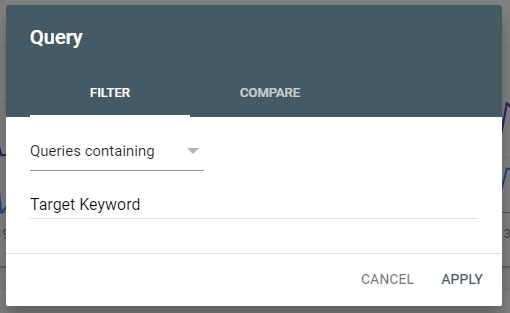
Once you hit apply, you’ll see all search terms containing your “Target Keyword” used to find your website. Have the results improved in the past week? The past month?
You can use the date compare filter to easily get a snapshot view of these metrics.
How to Check on the Performance of Your Cornerstone Content
There are often certain pages you’re trying to drive traffic to more than others. This content is called ‘Cornerstone Content,’ and is often lengthier and more comprehensive than your average blog post.
Sometimes, because this content is so thorough, it will rank well for keywords you never intended for it to (this is a good thing!).
Without Google Search Console or paid SEO tool, it’s virtually impossible to know what these ‘unexpected’ keywords are, but with Google Search Console it’s super easy!
Similar to your keyword filter, You click “+New…” and this time select “Page…”
Now, enter the URL of the cornerstone content (I recommend leaving off the http(s):// and www) to get more complete results.
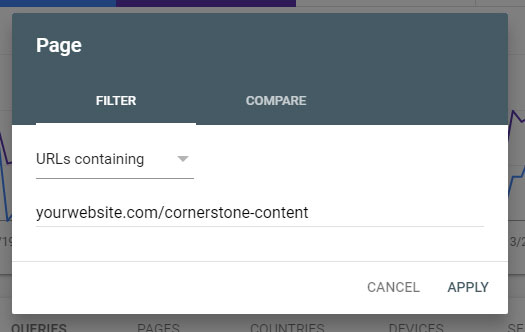
From here, you’ll want to analyze the URLs and check which unexpected keywords you’re ranking for.
If the unexpected keyword(s) ranks better than your target keyword, you may want to alter your meta-description and some of your content to include more information about this unexpected keyword.
Identify Queries that Rank High But Have a Low CTR
To perform this search, you’ll apply a filter in the table of your queries for those that show up in position 10 and higher. Then, you’ll click the ‘CTR’ column to sort your lowest-performing CTR results at the top.
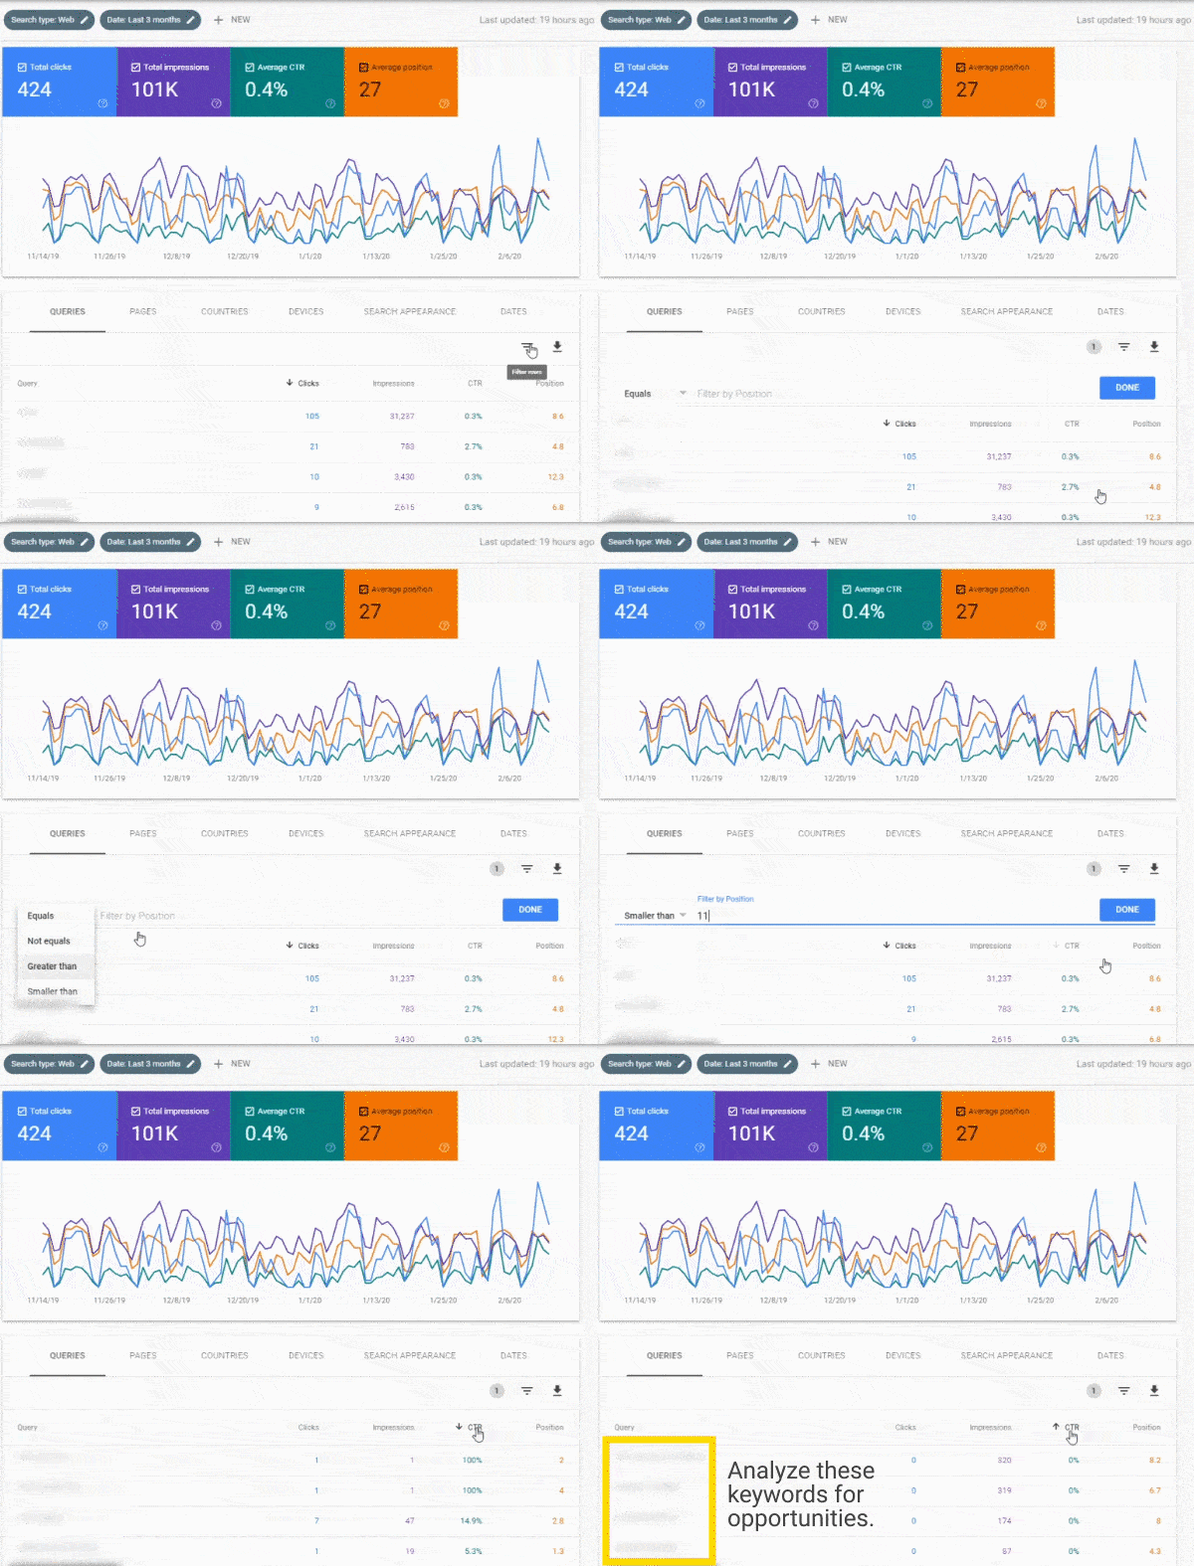
Once you’ve sorted through the data, you can click on the keyword you want to analyze further.
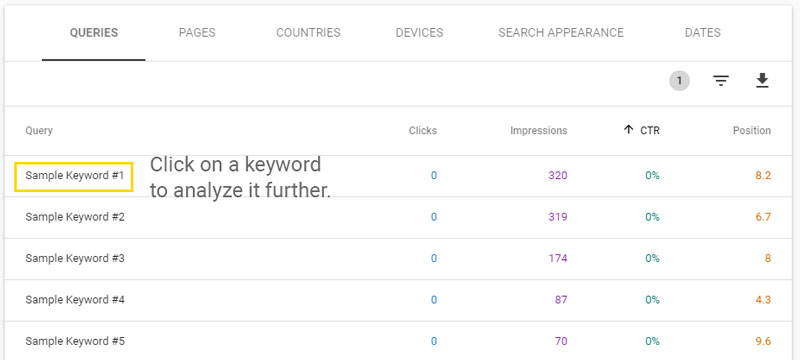
From here, you’ll check which page(s) is showing up for the query by clicking the page tab.

This is the page(s) you want to focus on improving.
When CTRs are lower than average for your page, your best bet is to alter the page’s meta-description and title to encourage more click-throughs.
The chart below (created from Google CTR stats generated by Backlinko) lists out the average expected CTR based on your position in search.
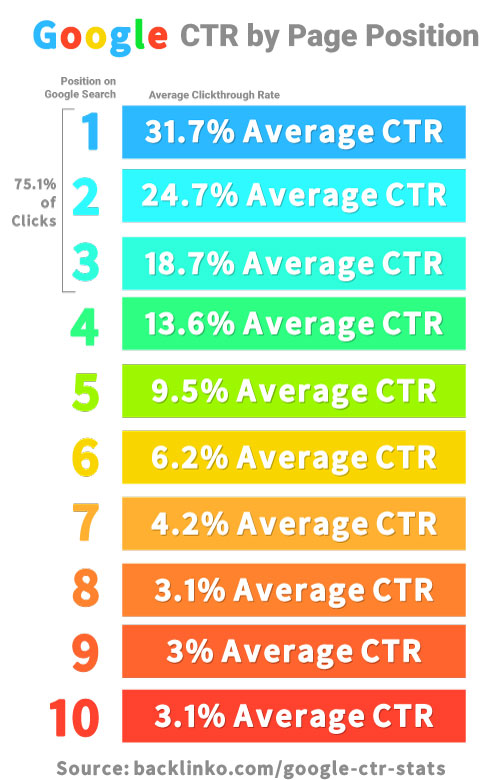
Look for high-position keywords that have significantly lower than expected CTR based on typical averages (consult the chart above as a reference.)
For example, if you’re listed as a #3 result on Google but you’re only getting a 1% CTR (when the #3 average is 18.7%) then you should have a great opportunity to improve your CTR.
How to Maximize Blog Coverage on Google using Search Console
Submitting an XML sitemap to Google guarantees that Google knows about every single blog post and blog page on your website.
And, when content is indexed by Google, there is potential for it to come up in Google Search. If a page is not indexed by Google, it will not come up in Google Search.
Submitting your sitemap will help maximize coverage of all of your blog posts and pages. And, every time a new blog post or page is published, your sitemap should be updated.
Note that an XML sitemap needs to be structured with code in a specific way using XML. Don’t worry though. No need to make the sitemap manually yourself.
If you’re on WordPress, installing the plugin Yoast SEO will auto-generate a sitemap of your blog. I highly recommend installing it.
To activate your Yoast-generated XML sitemap on Google Search Console, simply login to your blog’s admin, select ‘General,’ then click the ‘Features’ tab at the top.
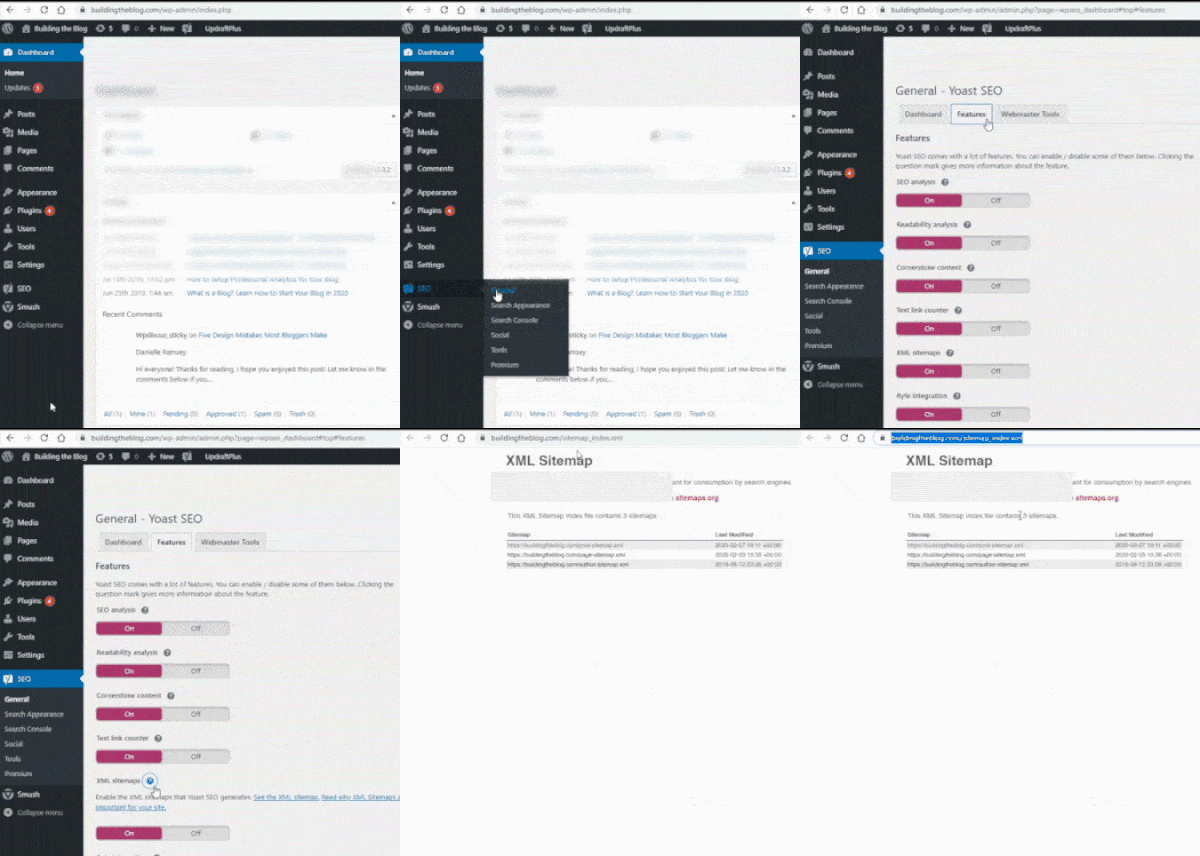
Finally, click the “?” icon next to XML sitemaps. This will show you a link “See the XML sitemap.’ Click this link.
The link will open up a new page. This is your XML sitemap.
Now, you’ll want to copy the link of this XML sitemap from the address bar to use in Google Search Console.
To submit the sitemap, login to Google Search Console, and then click the ‘Sitemaps’ link in the sidebar.
This will load a page where you paste the link to your sitemap and then hit ‘Submit.’

Google should periodically check this same sitemap for updates, but if you want to update Google more quickly, just submit your link again.
Alternatively, if you don’t have Yoast SEO you can use a website like xml-sitemaps.com to create a free XML sitemap, but you’ll need to upload the file to your website manually and keep it updated consistently.
How to Check if a Specific Page has Been Indexed Using Google Search Console
After you publish a blog post, you may be wondering “does Google know about it yet?”
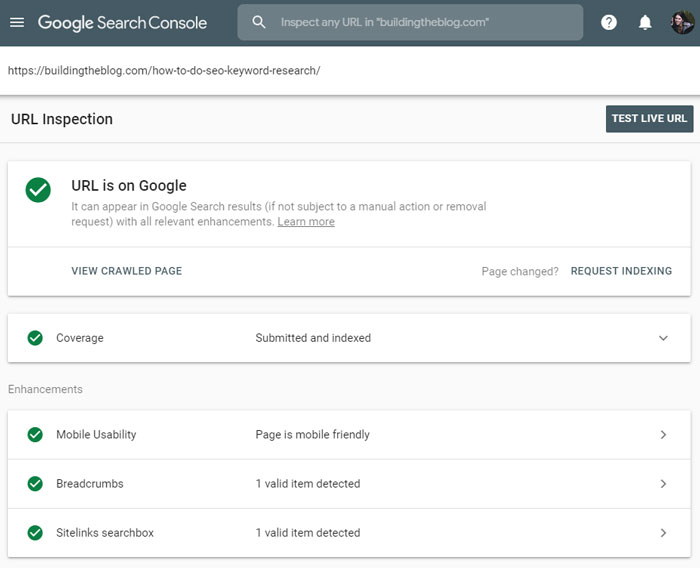
To check if a URL, or page is being indexed, use the URL inspection tool. This is located on the top left of the search console sidebar.
This tool will tell you how the Google Index sees your page and whether or not it’s been indexed.
To use it, all you need to do is copy and paste the link you want to inspect into the top search bar.

Wait a few seconds and BAM! Google Search Console gives a full coverage report on the submitted URL.
How to Remove Content from Google
There may be times when you want to remove content from Google.
Whatever the reason, while using a Robots.Txt file is one way to keep Google from indexing a page, Google Search Console will help expedite the process.
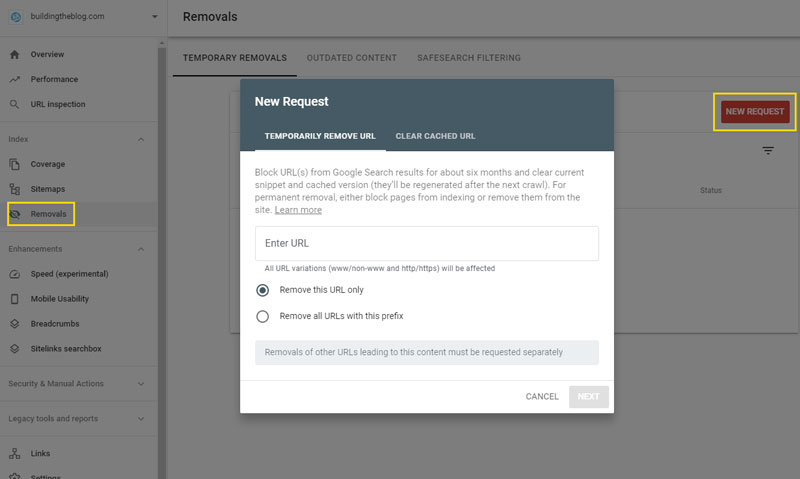
This feature is located in the sidebar under ‘Removals.’ Once you click this, click the button “New Request” and then copy and paste the URL you’d like to remove.
How Can You Use Google Search Console Insights to Improve Your SEO
Once you’ve identified opportunities for improvement, you’re probably wondering how you can use it to improve your rankings?
As I already pointed out, start with low-hanging fruit. Pages that are ranking high on Google and getting lots of impressions, but a low CTR can be improved by creating a better meta-description.
- Write your meta-description like it’s ad copy and entice searchers to click on your result.
- Include the query-term in the title and meta description.
- Try rewriting your page title to contain a question. Backlinko found that Title tags containing a question get 14.1% more clicks.
- Add additional (meaningful) content, especially if your page has fewer than 1,000 words.
Also, check your own website for opportunities to link internally to pages you want to rank higher. Go back to old posts and look for places where you can link to newer cornerstone content.
Also, consider link-building tactics to get more backlinks to your target content pages. Try contacting bloggers in similar niches for guest-blogging opportunities. Look for podcasts that conduct interviews.
Often, bloggers and podcast creators are always on the hunt for new content and will link back to your website when you work with them. This definitely takes some elbow grease, but it’s one of the more effective ways to improve your SEO.
To summarize, Google Search Console is really powerful for finding your best opportunities for improving SEO. From here, you need to employ traditional SEO tactics to improve pages that have the capacity to rank highly.
What to read next: